Dominate The Track.

Premium aftermarket dirt bike parts with exact year-make-model fitment. Real-time inventory. Get your machine race-ready with bolt-on upgrades from top brands like FMF, ProTaper, Renthal, and Vertex.

Available Upgrades

55 Results
AS3 Performance Aluminum Bash Plate - AS3 Performance aftermarket dirt bike part
20% OFF
Protection

AS3 Performance Aluminum Bash Plate

The AS3 Performance Heavy-Duty Aluminum Bash Plate is a rugged, full-coverage protective skid plate engineered in the UK to shield engine cases, water pump covers, oil pumps, and frame rails from devastating impacts in extreme off-road, hard enduro, and motocross environments. A single rock strike can crack cast magnesium engine cases, causing rapid oil loss and catastrophic engine seizure. The AS3 Performance bash plate delivers impenetrable protection across the most hostile terrains. Precision-formed from 4mm thick aerospace-grade 5083 structural aluminum plate, this bash plate delivers exceptional impact energy absorption and high resistance to puncture and shearing. CNC laser-cut venting slots across the front and sides maintain continuous cooling airflow around the engine cylinder and crankcases while allowing mud and wash water to drain rapidly. The side wings extend upward to provide full wrap-around defense for the water pump housing, ignition cover, and lower frame spars. The plate is finished in a durable, corrosion-resistant anodized or satin finish with laser-etched AS3 Performance branding. ### Technical Specifications & Engineering Specs - **Material Thickness**: 4.0mm heavy-duty 5083 marine/aerospace-grade aluminum plate - **Manufacturing**: CNC laser cut, precision press-brake formed, and TIG welded - **Wrap-Around Protection**: Extended side wings shield water pump and ignition covers - **Venting & Drainage**: Laser-cut airflow louvers and bottom mud-evacuation slots - **Mounting**: Heavy-duty stainless steel frame clamps and countersunk hardware - **Country of Origin**: Engineered and manufactured in the United Kingdom ### Step-by-Step Installation & Safety Protocols Installation requires approximately 15 minutes. Clean the lower frame cradle of dirt and debris. Position the AS3 Performance bash plate underneath the frame rails. Fit the rear mounting clamps or brackets over the frame tubes and align the front mounting holes with the factory frame tabs. Insert the provided high-tensile stainless steel Allen bolts with countersunk washers. Apply blue Loctite to all fastener threads and torque to 12-14 Nm. Check that the bash plate does not contact the exhaust header pipe or water pump hoses. ### Maintenance & Cleaning Maintenance involves periodically checking mounting bolt tightness and removing the plate during major annual deep cleans to flush trapped gravel from between the plate and frame rails. ### Frequently Asked Questions **Why is 5083 aluminum used instead of standard aluminum?** 5083 aluminum is a high-strength, work-hardenable alloy renowned for extreme impact toughness and corrosion resistance, making it substantially more resistant to cracking and gouging than soft standard alloys. **Does this bash plate protect the water pump and ignition covers?** Yes. The AS3 Performance plate features extended, formed side wings that wrap upward around both the water pump and ignition/stator covers, providing complete lower-engine protection. **Do I have to remove the bash plate to change my engine oil?** The plate features a precision CNC-machined drain hole aligned with the factory engine oil drain bolt, allowing routine oil changes without dismounting the skid plate. **Does the bash plate include all necessary mounting brackets?** Yes, AS3 Performance supplies all model-specific stainless steel frame clamps, Allen bolts, and countersunk washers in the box. **Will this bash plate fit with aftermarket oversized exhaust headers?** Yes, the front contour is shaped with generous curvature to ensure adequate clearance around aftermarket headers such as FMF Megabomb and Pro Circuit systems.

MSRP: $145.00 $116.00
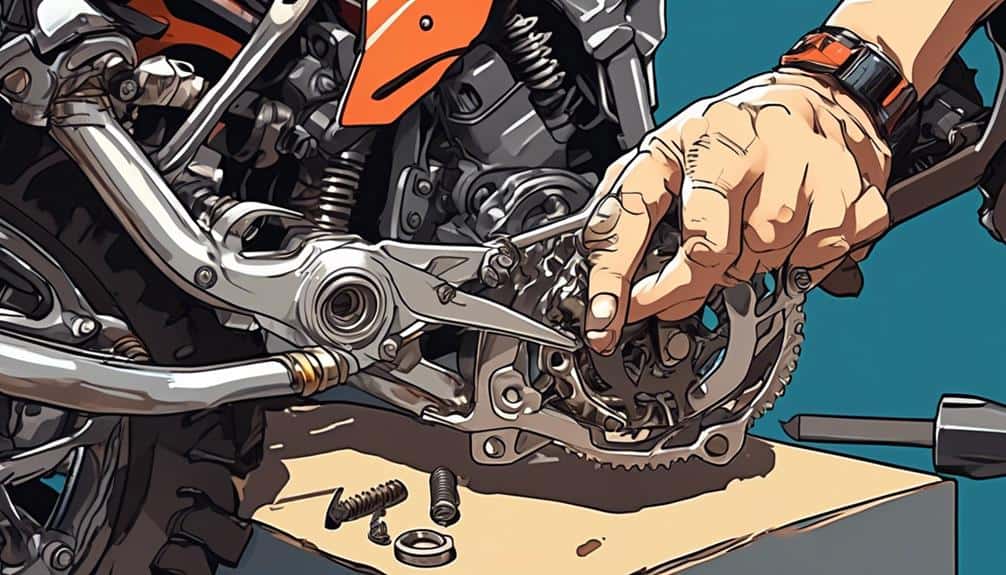
AS3 Performance Braided Brake Lines - AS3 Performance aftermarket dirt bike part
20% OFF
Braking

AS3 Performance Braided Brake Lines

The AS3 Performance Braided Stainless Steel Brake Line Kit is a safety-critical hydraulic braking upgrade engineered to eliminate the spongy, vague brake lever feel caused by standard factory rubber brake hoses. Stock rubber brake lines expand elastically under hydraulic pressure, especially when brake fluid heats up during aggressive riding. This volumetric expansion wastes valuable hydraulic master cylinder pressure, resulting in excessive lever travel, reduced braking power, and inconsistent bite points into turns. AS3 Performance brake lines eliminate line swell by utilizing an ultra-low friction PTFE (Teflon) internal core wrapped in a tight, high-density braid of 303/304 marine-grade stainless steel. This braided armor prevents any radial line expansion under extreme hydraulic pressures exceeding 4,000 PSI, delivering immediate 1:1 hydraulic force transfer from the master cylinder to the brake caliper pistons. The exterior is coated in a durable, UV-resistant PVC protective sleeve that prevents the stainless braid from scratching fork legs or chassis parts. The fittings are precision-swaged chrome-plated or stainless steel banjo ends designed with exact OEM routing angles. ### Technical Specifications & Engineering Specs - **Internal Core**: Smooth-bore PTFE (Polytetrafluoroethylene) Teflon hose - **Braided Armor**: High-density 303/304 marine-grade stainless steel wire weave - **Outer Jacket**: UV-stabilized clear or colored PVC protective coating - **Fittings**: Precision-swaged stainless steel / chrome-plated banjo unions - **Pressure Rating**: Tested to 4,000+ PSI burst pressure (far exceeding motorcycle brake pressures) ### Step-by-Step Installation & Safety Protocols > [!CAUTION] > Safety Warning: Hydraulic brake line installation is a safety-critical procedure. Incorrect installation, loose banjos, or improper bleeding can result in total brake failure and serious injury. If you are not confident in hydraulic brake service, have this part installed by a qualified motorcycle technician. Installation involves draining the existing brake fluid from the system. Unbolt the upper and lower banjo bolts holding the stock rubber line, catching residual fluid in a rag. Route the AS3 Performance braided line through the factory fork guard routing guides. Install the line using new copper crush washers on both sides of each banjo fitting (always use two new copper washers per banjo bolt). Torque banjo bolts to 18-20 Nm. Fill the master cylinder with fresh DOT 4 or DOT 5.1 brake fluid (never use DOT 5 silicone fluid). Bleed the brake system thoroughly using a vacuum bleeder or manual pump-and-hold method until all air bubbles are purged and the lever is rock-solid. Check for fluid leaks around all fittings before riding. ### Maintenance & Brake Fluid Flushing Maintenance involves inspecting the protective outer jacket for wear and flushing brake fluid annually. ### Frequently Asked Questions **Why does a braided brake line provide a firmer lever feel?** Unlike rubber hoses that balloon outwards under hydraulic pressure, stainless steel braided lines do not expand radially, ensuring that 100% of the master cylinder pressure is transmitted directly to clamping the brake pads against the rotor. **Are new copper crush washers included with the brake line?** Yes. AS3 Performance includes new copper sealing washers to ensure an airtight, leak-free seal at the master cylinder and caliper banjo joints. **What brake fluid should I use with AS3 Performance braided lines?** Use fresh, high-performance DOT 4 or DOT 5.1 glycol-based brake fluid from a sealed container. Never use DOT 5 silicone-based fluid, which is incompatible with standard off-road motorcycle braking seals. **Can braided lines get damaged if routed incorrectly?** Yes. Always ensure the line is routed through factory fork guard guides and has sufficient slack through the entire suspension compression stroke to avoid pinching or stretching.

MSRP: $65.00 $52.00
AS3 Performance Forged Brake Lever - AS3 Performance aftermarket dirt bike part
20% OFF
Handlebars & Controls

AS3 Performance Forged Brake Lever

The AS3 Performance Forged Front Brake Lever is a high-strength replacement brake control component engineered to deliver outstanding reliability, precise hydraulic modulation, and superior crash resistance compared to brittle cast aluminum OEM levers. Standard cast levers possess internal porosity that causes catastrophic fracturing during low-speed washouts or roost impacts. AS3 Performance eliminates this vulnerability by forging the lever blade from high-density 6061-T6 aluminum alloy before CNC finish-machining, aligning the grain structure of the metal to provide immense tensile strength and elastic resilience. Finished with a high-durability anodized coating and laser-etched AS3 Performance branding, the lever resists wear from abrasive dirt, sweat, and brake fluid contact. The lever profile is carefully radiused along the finger contact zone, distributing braking pressure evenly across index and middle fingers to eliminate pressure hotspots during aggressive braking sequences into tight corners. The lever incorporates an adjustable reach set-screw with a locking nut, allowing riders to position the lever bite point precisely where their hand mechanics operate with peak leverage. ### Technical Specifications & Engineering Specs - **Manufacturing Process**: High-pressure hot forged 6061-T6 aluminum blade with CNC pivot junction - **Finish**: Anodized protective treatment in factory-matched colorways - **Reach Adjustment**: Threaded stainless steel set screw with locking hex nut - **Master Cylinder Interface**: Precision-machined pushrod pocket with return spring alignment - **Weight**: 95 grams (optimized strength-to-weight balance) ### Step-by-Step Installation & Safety Protocols Installation is straightforward. Using an 8mm or 10mm wrench, remove the pivot bolt and locknut from the front brake master cylinder perch. Slide out the stock lever, taking care not to dislodge the master cylinder pushrod, rubber dust boot, or return spring. Clean the perch saddle and apply a light dab of waterproof grease to the pivot sleeve and pushrod contact pocket. Position the AS3 Performance lever, slide the pivot bolt through, and secure the lower locknut to 5-7 Nm. Check that the brake light switch (if equipped) and master cylinder piston activate smoothly without dragging. Test brake lever feel and verify that the front wheel spins freely when the lever is released. ### Maintenance & Safety Checks Maintenance involves periodically inspecting the pivot bolt for play, cleaning the pushrod contact pocket of road grime, and ensuring the reach adjustment screw remains locked tightly in place. ### Frequently Asked Questions **Why is a forged brake lever better than a standard cast lever?** Forging compresses the aluminum alloy under extreme pressure, eliminating microscopic air pockets and creating a continuous grain flow. This makes the AS3 lever significantly more resistant to snapping, often allowing it to bend slightly during a crash rather than breaking off completely. **Can I adjust how close the brake lever sits to the grip?** Yes. An adjustable stainless steel reach screw allows you to set the resting position of the lever blade closer to or farther from the grip, tailoring the initial engagement point to your preference. **Does this lever require bleeding the brake system to install?** No. Installing the lever is purely mechanical on the exterior pivot perch and does not require opening or bleeding the hydraulic brake fluid circuit. **What should I do if the lever bends in a hard crash?** Because the forged alloy is ductile, minor bends can often be carefully straightened once in a vise; however, if the metal shows stress whitening or cracking, replace the lever immediately.

MSRP: $45.00 $36.00
Acerbis Carbon Fiber Skid Plate - Acerbis aftermarket dirt bike part
20% OFF
Protection

Acerbis Carbon Fiber Skid Plate

The Acerbis Carbon Fiber Skid Plate is an ultra-lightweight, maximum-protection engine and frame shield engineered for competitive motocross and off-road racing. Standard cast or stamped aluminum skid plates are heavy, transmit harsh engine vibration directly into the chassis, and alter frame flex characteristics, causing the bike to feel stiff and unforgiving in rough chop. Plastic skid plates, while flexible, can crack when struck at high speed by sharp boulders. The Acerbis Carbon Fiber Skid Plate delivers the ultimate fusion of extreme structural stiffness, featherweight mass, and superior impact defense. Hand-laid from multiple layers of aerospace-grade woven carbon fiber reinforced with high-strength structural epoxy resin, this skid plate provides impenetrable protection for engine center cases, water pump housing, oil filter cavity, ignition cover, and frame cradle rails. The smooth, frictionless carbon surface glides effortlessly over rocks and logs without hanging up. Furthermore, carbon fiber's natural acoustic damping properties absorb internal engine clatter, resulting in a noticeably quieter riding experience. An integrated mounting system isolates the skid plate from frame flex, allowing the motorcycle's chassis to bend and track naturally through rough ruts. ### Technical Specifications & Engineering Specs - **Material**: Multi-layer pre-preg aerospace carbon fiber composite with epoxy resin matrix - **Coverage**: Full engine center cases, water pump cover, ignition cover, and lower frame spars - **Mounting System**: CNC-machined aluminum brackets with rubber vibration isolation grommets - **Acoustic Profile**: High-damping composite matrix reduces reflected engine noise - **Weight**: Under 450 grams (providing maximum protection at minimum weight) ### Step-by-Step Installation & Safety Protocols Installation requires basic hand tools. Remove any existing plastic frame guards or stock guard plates. Position the Acerbis Carbon Fiber Skid Plate against the underside of the frame rails. Align the rear frame hooks or bracket hardware with the lower cross-member. Insert the supplied CNC-machined aluminum mounting brackets and stainless steel flush-mount hardware. Apply medium-strength thread locker to the bolt threads and torque evenly to 10-12 Nm (do not over-tighten, which can crush the composite matrix). Ensure the plate does not contact engine cases directly, leaving a 3-5mm isolation air gap. ### Maintenance & Care Protocol Maintenance involves removing the skid plate during oil changes (if your model's drain plug is not accessible through the pre-drilled drainage port) and inspecting the underside for composite abrasion. Wash with mild soap and water. ### Frequently Asked Questions **Does carbon fiber reduce engine noise compared to aluminum skid plates?** Yes. Aluminum skid plates act like acoustic sounding boards that amplify internal engine noises upward to the rider's helmet. Carbon fiber naturally absorbs and dampens acoustic resonance, resulting in a much quieter ride. **Will this skid plate affect my motorcycle's frame flex?** No. Unlike thick aluminum skid plates that bridge across the frame rails and make the chassis feel rigid and harsh, the Acerbis carbon plate is mounted with flexible isolators that allow the chassis to flex as designed. **Is there an access hole for engine oil drain bolts?** Most Acerbis Carbon Skid Plates feature pre-cut drain plug access windows allowing routine oil changes without removing the entire plate. **How does carbon fiber hold up to direct rock strikes?** The woven carbon fiber layers distribute point-impact energy across the entire laminate structure, preventing penetration and deflecting rocks safely away.

MSRP: $189.95 $151.96
Acerbis Full Plastic Kit (OEM Colors) - Acerbis aftermarket dirt bike part
20% OFF
Plastics & Bodywork

Acerbis Full Plastic Kit (OEM Colors)

The Acerbis Full Plastic Kit (OEM Colors / Manufacturer Part 2198000438 application) is the world's leading factory-replica bodywork kit engineered to replace scratched, cracked, or UV-faded stock motorcycle plastics with a brand-new showroom finish. Acerbis has manufactured premier off-road bodywork in Italy for over five decades and serves as the official OEM plastic supplier to top factory racing teams. Whether you are rebuilding a tired race bike, restoring a bike after a crash, or changing colorways (available in factory OEM color matches, stealth full-black editions, original 02 vintage schemes, and classic original 08 team hues), Acerbis kits deliver factory-spec precision. Every piece in the Acerbis Full Plastic Kit—including the front fender, rear fender, radiator shrouds, side number plates, front number plate, and lower fork guards—is injection molded from proprietary DGP (Durable Gloss Polypropylene). DGP combines high-density polypropylene resin with specialized elastomeric polymers that deliver incredible impact flexibility, preventing panels from shattering or creasing during hard impacts and cold-weather riding. The material is infused with UV stabilizers to eliminate sun fading and oxidation, maintaining a deep, brilliant gloss finish. All mounting holes and fastener recesses are pre-drilled to exact factory tolerances for immediate bolt-on installation without drilling or trimming. ### Technical Specifications & Engineering Specs - **Material Formulation**: DGP (Durable Gloss Polypropylene) high-flex resin - **Manufacturing Process**: High-pressure injection molding in Italy - **Included Components**: Front fender, rear fender, radiator shrouds (pair), side number plates (pair), front number plate, and fork guards (pair) - **Mounting Holes**: 100% factory pre-drilled to exact OEM frame and subframe locations - **UV Resistance**: Formulated with UV inhibitors to prevent color fade and brittleness ### Step-by-Step Installation & Safety Protocols Installation is straightforward using standard 8mm and 10mm T-handles and your factory mounting hardware (or a fresh plastic fastener kit). Remove seat bolts and dismount the seat. Unbolt the side panels, radiator shrouds, front number plate, front fender, rear fender, and fork guards. Clean the chassis subframe and fuel tank of accumulated dirt. Position the new Acerbis panels onto the motorcycle, loosely inserting all bolts with their factory shoulder washers and rubber grommets. Once all panels are loosely aligned to ensure seamless body gaps, tighten all fasteners evenly to 6-8 Nm (do not over-tighten, which can crush the plastic grommets). ### Maintenance & Appearance Care Maintenance involves washing plastics with gentle soap and water. Never apply solvent degreasers directly onto raw plastic. Treat with silicone-based plastic detailer after washing to prevent mud and clay from adhering to the panels. ### Frequently Asked Questions **What pieces are included in the Acerbis Full Plastic Kit?** The full kit includes the front fender, rear fender, left and right radiator shrouds, left and right side number plates, front number plate, and lower fork guards. **How do Acerbis OEM colors match the factory motorcycle plastic?** Acerbis manufactures OEM plastics directly for major European and Japanese motorcycle factories, guaranteeing that their OEM-color plastic kits match original factory color codes, gloss levels, and panel profiles exactly. **What is DGP and why is it superior to standard aftermarket plastic?** DGP (Durable Gloss Polypropylene) is Acerbis's proprietary formulation that combines maximum surface gloss with high ductile elasticity, allowing the plastic to bend under heavy impacts without snapping or leaving white stress crease marks. **Can graphics be applied directly onto new Acerbis plastics?** Yes. Clean the plastic surface thoroughly with contact cleaner or isopropyl alcohol to remove mold release oils before applying graphics for maximum adhesive bonding.

MSRP: $159.95 $127.96
Acerbis X-Grip Frame Guards - Acerbis aftermarket dirt bike part
20% OFF
Plastics & Bodywork

Acerbis X-Grip Frame Guards

The Acerbis X-Grip Frame Guards are innovative dual-injected protective chassis components engineered to replace thin adhesive frame tape and protect exposed aluminum and steel frame spars from boot rub, gravel abrasion, and rock gouges. Modern motocross boots with heavy-duty hinged plastic buckles and metal ankle pivots quickly grind through frame paint and wear deep structural grooves into aluminum frame rails. The X-Grip solves this by providing tough physical protection while significantly enhancing rider machine control. The X-Grip features a cutting-edge dual-injection molding process. The outer layer is crafted from durable, impact-resistant polycarbonate plastic that forms a rigid protective shield against the frame spars and subframe junction. The exterior contact layer is molded from high-traction, soft vulcanized rubber featuring a raised diamond-grid texture. This rubber surface provides immense boot friction, allowing the rider to lock their knees and lower legs firmly against the motorcycle chassis during aggressive standing acceleration, braking, and deep rut carving, dramatically reducing arm fatigue and upper-body strain. ### Technical Specifications & Engineering Specs - **Molding Process**: Dual-injection co-molded polycarbonate and vulcanized rubber - **Protection Zone**: Frame main spars, lower frame cradle, and subframe junction - **Traction Pattern**: Raised diamond-matrix rubber grip pattern - **Attachment Method**: Reusable frame-clamp brackets and heavy-duty nylon cable ties - **Weight**: Approx. 180 grams per pair ### Step-by-Step Installation & Safety Protocols Installation is simple and requires zero permanent modifications. Clean the motorcycle frame rails thoroughly using contact cleaner or isopropyl alcohol to remove all grease, chain wax, and mud residue. Position the left and right Acerbis X-Grip guards over the corresponding frame spars. The guards utilize existing factory mounting holes (such as master cylinder guards or subframe bolts) along with high-strength UV-resistant cable ties that wrap securely around the internal frame perimeter. Tighten the fasteners and cable ties securely, trimming any excess cable tie tail flush so it does not snag boots or pants. ### Maintenance & Service Inspection Maintenance involves washing with standard bike wash soap and inspecting cable ties after heavy mud races or rocky trail excursions. If a cable tie is severed by roost, replace it with a heavy-duty nylon zip tie. Remove periodically to clean any sand trapped behind the guard. ### Frequently Asked Questions **How does the X-Grip rubber surface help reduce arm pump?** By providing a high-friction rubber contact patch for your boots and knees, the X-Grip allows you to grip the machine with your lower body, transferring holding forces into your legs and relieving forearm tension. **Will the X-Grip frame guards scratch my frame underneath?** Because the guards fit snugly against the frame, they protect the metal from damage. Cleaning behind the guards during periodic deep maintenance prevents fine sand from acting as an abrasive paste. **Are replacement mounting zip-ties required during regular maintenance?** Standard heavy-duty zip ties can be used whenever you remove the guards for deep subframe or swingarm maintenance. **Does the X-Grip interfere with the rear brake master cylinder?** No. The right-side guard is molded with precise clearances around the rear master cylinder and brake clevis for unimpeded brake operation.

MSRP: $49.95 $39.96
Boyesen Rad Valve System - Boyesen aftermarket dirt bike part
20% OFF
Intake & Fuel

Boyesen Rad Valve System

The Boyesen Rad Valve System is a complete, high-performance aerodynamic intake and reed valve assembly engineered to replace restrictive OEM reed blocks on modern two-stroke motocross and off-road motorcycles. Factory reed blocks feature flat, boxy intake runners that create severe boundary-layer turbulence, dead air pockets, and uneven fuel distribution across the intake tract. The Boyesen Rad Valve eliminates this restriction with a one-piece cast aluminum housing featuring aerodynamic surface profiling and multi-stage aerospace carbon reed petals. The internal architecture of the Rad Valve incorporates Boyesen's patented Aerodynamic Surface Optimization (ASO). The intake tract is precision-tapered and contoured with continuous curvature, accelerating intake charge velocity and directing fuel-air mixture smoothly into both the upper and lower crankcase transfer ports. The system utilizes Boyesen's multi-stage Pro Series carbon fiber reed petals: a lightweight top petal responds instantly to low-RPM vacuum pulses for razor-sharp bottom-end throttle snap, while a stiffer secondary petal opens at high RPM to deliver maximum volumetric airflow without reed flutter. On the track, riders experience instantaneous throttle response out of corners, eliminated low-end hesitation, and stronger mid-to-top over-rev. ### Technical Specifications & Engineering Specs - **Body Construction**: One-piece aerodynamic cast aluminum intake housing - **Reed Petals**: Dual-stage aerospace carbon fiber Pro Series matrix - **Airflow Optimization**: Patented Aerodynamic Surface Optimization (ASO) interior porting - **Gasket System**: High-density composite crankcase sealing gasket included - **Maintenance**: Replaceable reed petal packs available for routine servicing ### Step-by-Step Installation & Safety Protocols Installation requires approximately 30-45 minutes. Remove the seat, subframe bolts, and loosen the carburetor/throttle body airboot clamps. Pivot the subframe back to gain access to the intake manifold. Remove the four bolts securing the stock reed cage to the engine crankcase. Discard the old gasket and thoroughly clean the crankcase mounting surface of old sealant. Install the Boyesen Rad Valve using the supplied high-grade gasket, taking care not to touch the carbon reed petals with oily fingers. Reinstall the mounting bolts with blue thread locker and torque in an X-pattern to 8-10 Nm (do not over-tighten, which can distort the reed cage sealing face). Reconnect the intake boot and subframe, verifying an airtight seal around all boots. ### Maintenance & Reed Inspection Protocol Maintenance involves periodically inspecting reed petals for chipping, fraying, or light gaps by holding the valve up to a light source. Replace reed petals if gaps exceed 0.015 inches or after 40-50 hours of competitive two-stroke racing. ### Frequently Asked Questions **How does the one-piece aluminum Rad Valve differ from a plastic reed cage?** The solid cast-aluminum body maintains its exact aerodynamic shape without flexing under high engine vacuum or warping from engine heat, ensuring consistent reed sealing and precise airflow velocity. **Do I need to change carburetor jetting when installing the Rad Valve?** Because the Rad Valve dramatically improves intake velocity and atomization, you may find the low-end throttle response is so efficient that the air screw or pilot jet needs slight adjustment (often 1/2 turn on the air screw) to achieve perfection. **Are the carbon fiber reed petals replaceable?** Yes. Boyesen manufactures direct-fit replacement Pro Series carbon reed petal kits, allowing you to refresh the valve without purchasing a complete new intake assembly. **Will the Rad Valve fit fuel-injected two-strokes (TPI / TBI)?** Yes, Boyesen produces model-specific Rad Valves engineered to match the intake throttle body manifolds of modern fuel-injected two-stroke machines.

MSRP: $189.95 $151.96
Boyesen Supercooler Water Pump Kit - Boyesen aftermarket dirt bike part
20% OFF
Intake & Fuel

Boyesen Supercooler Water Pump Kit

The Boyesen Supercooler Water Pump Kit is a championship-winning thermal management upgrade engineered to replace restrictive OEM water pump covers and stamped impellers on modern four-stroke and two-stroke motocross engines. High-revving competition four-strokes generate massive thermal loads; under heavy race conditions or tight mud tracks, factory water pumps create severe hydrodynamic cavitation—microscopic vapor bubbles that collapse and prevent coolant from contacting the cylinder walls, leading to rapid boiling, horsepower loss from thermal expansion, and head gasket failure. The Supercooler kit resolves this through patented hydrodynamic design. The water pump cover is precision cast from aerospace-grade aluminum, featuring an enlarged internal intake cavity with smoothly contoured water passages that eliminate the sharp 90-degree internal bends found in OEM covers. Paired with Boyesen's investment-cast aluminum high-flow impeller with curved, hydro-dynamically shaped vanes, the Supercooler increases coolant flow rate by up to 25-30% while completely eliminating cavitation. By moving coolant through the engine faster and more efficiently, the Supercooler lowers engine operating temperatures by 10 to 15 degrees Fahrenheit, preserving peak engine horsepower and preventing boil-overs during long motos. ### Technical Specifications & Engineering Specs - **Cover Material**: Precision investment cast aluminum alloy - **Impeller**: Hydrodynamically shaped high-flow aluminum nautilus impeller - **Cooling Performance**: Increases coolant flow volume by up to 25-30% - **Thermal Reduction**: Lowers peak engine operating temperature by 10°F to 15°F - **Sealing**: High-grade nitrile case gasket and stainless steel mounting hardware included ### Step-by-Step Installation & Safety Protocols Installation requires draining the engine coolant completely into a clean container. Remove the stock water pump cover bolts, gently tapping the cover with a plastic mallet to break the gasket seal. Unscrew the factory impeller from the water pump shaft (note whether your model utilizes standard right-hand or reverse left-hand threads). Clean the pump cavity and inspect the mechanical water pump shaft seal for leaks. Thread the Boyesen high-flow impeller onto the shaft, torquing to 6-8 Nm with blue Loctite. Place the supplied Boyesen gasket onto the engine case, install the Supercooler cover, and torque the cover bolts in sequence to 8-10 Nm. Refill the cooling system with high-grade motorcycle coolant, burp the cooling system of air pockets, and check for leaks. ### Maintenance & Coolant Care Maintenance consists of routine coolant flushes per your factory manual intervals and checking the weep hole for seal leakage. ### Frequently Asked Questions **How does lowering engine temperature help maintain horsepower?** When an engine overheats, cylinder and piston tolerances swell, oil viscosity thins, and the engine ECU often retards ignition timing to prevent detonation, causing a noticeable loss of horsepower. The Supercooler maintains stable, optimal thermal conditions. **Can I run the Supercooler with standard engine coolant?** Yes. The Supercooler works effectively with standard ethylene glycol, propylene glycol, and waterless racing coolants. **Does the Supercooler cover stick out further than the stock cover?** The Supercooler cover is engineered with a low-profile exterior that easily clears standard aftermarket skid plates and brake pedals while optimizing internal volume. **Can a worn water pump seal cause coolant to enter the engine oil?** Yes. If the internal mechanical water pump seal fails, coolant can weep into the transmission or engine oil; always inspect the seal when replacing the water pump impeller.

MSRP: $199.95 $159.96
D.I.D ERT3 Non O-Ring Gold Chain 520 - D.I.D aftermarket dirt bike part
20% OFF
Drive Chains

D.I.D ERT3 Non O-Ring Gold Chain 520

The D.I.D 520 ERT3 Non O-Ring Gold Chain is the premier lightweight competition drive chain engineered specifically for world-class Supercross, AMA Pro Motocross, and high-performance closed-course racing. Replacing heavy, drag-inducing sealed chains or low-grade OEM non-sealed chains, the ERT3 is optimized to deliver maximum horsepower transfer to the rear wheel with the lowest possible rotating inertia and frictional resistance. D.I.D is the factory chain choice for elite teams worldwide, and the ERT3 represents their highest non-sealed racing specification. The ERT3 features D.I.D's patented Solid Bushing technology and proprietary SDH (Super-Dai-Hard) high-tech pin treatment. The pins undergo an advanced chromium carbide surface hardening process that produces an extremely hard exterior layer while maintaining a soft, shock-absorbing inner core. This delivers immense tensile strength (rated at 8,300 lbs) and a 25% increase in anti-wear elongation lifespan compared to previous-generation ERT2 chains. The outer plates are finished in radiant gold plating, while the inner plates are shot-peened natural steel, offering superior corrosion resistance and professional factory aesthetics. ### Technical Specifications & Engineering Specs - **Chain Pitch**: 520 Pitch (Standard 5/8" pitch x 1/4" roller width) - **Chain Type**: Non O-Ring competition race chain (Zero seal drag) - **Tensile Strength**: 8,300 lbs (37.0 kN) maximum tensile rating - **Pin Treatment**: SDH (Super-Dai-Hard) chromium carbide surface hardening - **Plating**: Gold outer link plates with shot-peened natural inner links ### Step-by-Step Installation & Safety Protocols Installation requires a 520 chain breaker tool and a master link press tool. Count and trim the chain to the exact link count matching your sprocket combination and swingarm wheelbase setting. Route the chain over the countershaft sprocket and rear sprocket. Apply quality chain assembly lubricant to the included clip-type master link pins and side plate. Press the side plate onto the pins using a master link press tool until the clip grooves are fully exposed. Install the spring clip with the closed, rounded end facing the direction of forward chain rotation (this prevents trail debris from unseating the clip). Adjust chain slack to factory swingarm specifications (typically 50-58mm measured from swingarm slider to chain center). ### Maintenance & Lubrication Protocol Maintenance for a non O-ring race chain requires cleaning with a chain brush and dedicated cleaner after every moto wash, drying thoroughly with compressed air, and applying high-performance non-fling chain lubricant before each session. ### Frequently Asked Questions **Why do Supercross and Motocross racers choose non O-ring chains like the ERT3?** Non O-ring chains have zero internal rubber seal friction and significantly lower rotating mass, ensuring that every available fraction of engine horsepower reaches the rear tire for maximum acceleration out of the gate. **Which way should the master link clip be installed?** The closed, solid end of the master link clip must always face the direction of forward chain rotation. If the open end faces forward, contact with the chain guide or track debris can knock the clip off. **How often should I clean and lube the D.I.D ERT3 chain?** Because it does not have internal O-ring grease reservoirs, the ERT3 should be thoroughly cleaned, dried, and lubricated after every single ride or wash to prevent premature wear and rust. **What is the maximum engine displacement recommended for the ERT3?** The D.I.D 520 ERT3 is rated for competition motocross machines up to 450cc four-strokes.

MSRP: $115.95 $92.76
D.I.D VT2 X-Ring Enduro Chain 520 - D.I.D aftermarket dirt bike part
20% OFF
Drive Chains

D.I.D VT2 X-Ring Enduro Chain 520

The D.I.D 520 VT2 X-Ring Enduro Gold Chain (Enduro Narrow Series) is the ultimate heavy-duty sealed drive chain engineered specifically for off-road, enduro, cross-country, and dual-sport motorcycles. Many standard sealed O-ring chains are too wide for compact motocross-based enduro chassis, causing the chain side plates to rub against the engine case, front chain guide, or rear tire. D.I.D solved this clearance issue by designing the VT2 with a specialized narrow profile that delivers all the longevity of a sealed chain within the slim width of a non-O-ring chain. The core technology of the VT2 is D.I.D's patented X-Ring seal architecture. Unlike traditional round O-rings that experience high surface friction and squash flat under tension, the X-Ring features four flexible contact lips that twist rather than squash, reducing mechanical drag by 50% while creating four independent sealing barriers that lock high-viscosity factory grease inside the pin-bushing junction. This completely seals out abrasive sand, water, and mud, extending chain wear life by up to 1.5 to 2 times compared to standard O-ring chains. The gold-plated outer links provide excellent corrosion resistance against stream crossings and wet trail conditions. ### Technical Specifications & Engineering Specs - **Chain Pitch**: 520 Narrow Series (Engineered for compact off-road swingarm clearances) - **Sealing Technology**: Patented D.I.D low-friction X-Ring elastomer seals - **Tensile Rating**: 8,440 lbs (37.5 kN) - **Frictional Drag**: 50% less resistance compared to standard round O-ring chains - **Master Link**: Semi-press fit clip-type master link with gold side plates ### Step-by-Step Installation & Safety Protocols Installation is performed with a 520 chain breaker and link press tool. Determine appropriate chain length, cut the chain to size, and align the chain ends over the rear sprocket. Thoroughly coat the four X-rings with the supplied high-tack grease and place two rings over the master link pins. Insert the master link from the back of the chain, install the remaining two greased X-rings, and press the outer side plate into position using a chain press tool. Secure the included semi-press clip master link with the closed end oriented forward in the direction of travel. Set chain slack to 50-55mm to prevent swingarm binding during deep suspension compression. ### Maintenance & Wash Guidelines Maintenance involves washing with a gentle chain brush, rinsing with low-pressure water (never direct a high-pressure pressure washer directly at the X-rings), drying, and spraying with O-ring-safe chain lubricant. ### Frequently Asked Questions **Will the D.I.D VT2 narrow chain fit my bike without rubbing the case?** Yes. The VT2 is specifically engineered with narrow link plates to eliminate chain rub on compact modern 250cc and 450cc engine cases and chain guides. **How do X-Rings differ from standard O-Rings?** D.I.D X-Rings have four contact points that seal out contaminants with 50% less frictional resistance than standard O-rings, providing better engine efficiency and longer seal life. **Is it safe to use brake cleaner or harsh solvents on an X-Ring chain?** No. Harsh solvents like brake cleaner, gasoline, or acid degreasers can dry out, swell, and destroy the rubber X-rings. Always use dedicated O-ring safe chain cleaners. **Can I reuse the master link after removing the chain?** It is strongly recommended to install a new D.I.D master link whenever the chain is disassembled to ensure optimal pin press and clip tension.

MSRP: $139.95 $111.96
Dunlop Geomax AT81 Enduro Rear Tire - Dunlop aftermarket dirt bike part
20% OFF
Tires

Dunlop Geomax AT81 Enduro Rear Tire

The Dunlop Geomax AT81 Enduro Rear Tire is the undisputed industry standard for cross-country, GNCC, and hard enduro off-road competition. Engineered specifically to replace motocross-specific tires that bounce off rocks and chunk knobs in technical woods terrain, the AT81 features a specialized off-road carcass design and an ultra-durable rubber compound formulated to conquer jagged roots, slick river rocks, mud bogs, and hard-packed logging roads. The AT81 incorporates Dunlop's Lateral Groove tread block design on the shoulder knobs, which provides additional biting edges for side-hill traction and cambered rut carving. The center knobs are arranged in a staggered chevron pattern with recessed channels that provide immense drive traction on loose dirt and slippery shale. The tire casing utilizes two plies of high-strength nylon wrapped in a specialized cross-ply orientation, providing a plush, conforming footprint that wraps around square-edge obstacles rather than deflecting. An advanced wear-resistant polymer compound resists tearing, knob chunking, and abrasive degradation during multi-hour off-road events. ### Technical Specifications & Engineering Specs - **Tire Sizing**: Standard 18" off-road / enduro rear rim application (e.g. 110/100-18) - **Terrain Classification**: All-Terrain Enduro (GNCC, singletrack, rocks, roots, hard enduro) - **Tread Design**: Lateral Groove shoulder blocks with DIRTsponge compliant carcass - **Compound**: High-density anti-chunking synthetic polymer blend - **Carcass**: 2-ply high-strength cross-woven nylon carcass ### Step-by-Step Installation & Safety Protocols Installation utilizes standard tire levers and rim lube. Because the AT81 features a pliable off-road casing, bead seating is exceptionally smooth. Remove the rear wheel and deflate the existing tube. Spoon the old tire off the rim, clean the rim well, and check the rim lock for rubber pad deterioration. Apply lubricant to the AT81 beads, align the directional rotation indicator, and guide the heavy-duty tube (or off-road mousse) inside. Lever the bottom bead over the rim, secure the valve stem loosely with its retaining nut, and work the top bead into the rim center drop-channel. Inflate to seat beads, set trail operating pressure (typically 10.5 to 12.5 PSI for standard tubes, or 6 to 9 PSI with heavy-duty tubeless systems for extreme enduro), and torque the rim lock nut to 14 Nm. ### Maintenance & Pressure Setup Maintenance involves checking tire pressures prior to every trail ride and inspecting for puncture debris embedded between knobs. ### Frequently Asked Questions **What makes the AT81 better for woods riding than a motocross tire?** The AT81 features a more compliant carcass that flexes over rocks, roots, and trail obstacles, providing a larger, softer contact patch that finds traction where stiff motocross tires slip and deflect. **Can I use the AT81 for occasional motocross track riding?** While the AT81 can handle casual motocross sessions, its softer off-road carcass and tread compound are optimized for woods, cross-country, and enduro terrain rather than high-load supercross jump landings. **What is the recommended air pressure for technical singletrack?** For rocky, root-strewn singletrack using heavy-duty inner tubes, 10.5 to 11.5 PSI provides optimal traction without excessive risk of pinch flats. With bib mousse inserts, the AT81 delivers unbeatable traction and flat-proof reliability. **How does the AT81 resist knob chunking on sharp shale?** The proprietary polymer matrix incorporates high-density molecular binders that flex under sharp rock shearing forces rather than tearing or cracking away from the casing.

MSRP: $145.95 $116.76
Dunlop Geomax MX34 Front Tire (80/100-21) - Dunlop aftermarket dirt bike part
20% OFF
Tires

Dunlop Geomax MX34 Front Tire (80/100-21)

The Dunlop Geomax MX34 Front Tire (size 80/100-21) is a cutting-edge soft-to-intermediate motocross and off-road front tire engineered to replace standard OEM front rubber with exceptional cornering grip, precise line-holding capability, and predictable slide recovery. Designed as the direct successor to the championship-proven MX33, the MX34 introduces an updated casing construction and an advanced tread block architecture that delivers superior feedback when leaning into hard-packed ruts or traversing loose topsoil over hard base. The MX34 features Dunlop's Progressive Cornering Block Technology (PCBT) on the shoulder knobs, which incorporates advanced diamond-shaped block-within-a-block tread elements. This increases surface area contact and edge bite as lean angle increases. A new carcass material with optimized ply tension improves carcass compliance, allowing the tire to absorb braking bumps and track chop without deflecting off-line. The rubber compound features an advanced molecular polymer blend with increased carbon black particle density, enhancing tear resistance and knob longevity over rock-infested terrain and hard-baked dirt. ### Technical Specifications & Engineering Specs - **Tire Size**: 80/100-21 (Standard 21" front motocross/enduro wheel) - **Terrain Application**: Soft-to-Intermediate (loam, sand, mud, rutted tracks, mixed dirt) - **Tread Technology**: Progressive Cornering Block Technology (PCBT) Advanced - **Carcass Construction**: CTCS (Carcass Tension Control System) optimized 2-ply nylon - **Tread Pattern**: Directional rotation with diamond-block shoulder knobs ### Step-by-Step Installation & Safety Protocols Installation requires tire spoons, rim lubricant (soapy water or commercial bead paste), a valve core tool, and proper tire rim protectors. Deflate the old tube, break the bead on both sides, loosen the rim lock nut, and spoon the old tire off the rim. Inspect the rim band, spokes, and rim lock for burrs. Lightly dust the inner casing of the Dunlop MX34 with talcum powder, insert the inner tube (or mousse bib), align the tire rotation arrow with forward wheel rotation, and guide the valve stem through the rim hole. Spoon the bottom bead over the rim, followed by the top bead, working progressively away from the rim lock. Inflate to 30 PSI to fully seat the bead onto the rim safety ridges, then adjust to operating pressure (typically 12.5 to 14.0 PSI for motocross). Tighten the rim lock nut to 12-15 Nm. ### Maintenance & Pressure Guidelines Maintenance involves checking cold tire pressure before every riding session and inspecting tread knobs for tearing or rounded leading edges. Keep tires away from extreme heat sources and avoid direct solvent exposure during bike washing. ### Frequently Asked Questions **What terrain is the Dunlop Geomax MX34 optimized for?** The MX34 is engineered for soft-to-intermediate conditions, excelling in soft dirt, loam, sand, muddy ruts, and mixed terrain where maximum traction and predictable cornering bite are essential. **What is the recommended tire pressure for the MX34 front tire?** For standard motocross track use with heavy-duty tubes, recommended cold pressure ranges from 12.5 to 14.0 PSI depending on track hardness and rider weight. For rocky enduro trails, 11.5 to 13.0 PSI is common. **Is the Dunlop MX34 directional?** Yes. The tread pattern features directional block angling; always ensure the rotation arrow on the tire sidewall matches the forward rotation direction of the front wheel. **Can I run the MX34 front tire with a Tubliss system?** Yes, the reinforced bead profile of the Geomax MX34 forms an excellent seal with high-pressure Tubliss 21-inch systems.

MSRP: $139.95 $111.96
Dunlop Geomax MX34 Rear Tire (110/90-19) - Dunlop aftermarket dirt bike part
20% OFF
Tires

Dunlop Geomax MX34 Rear Tire (110/90-19)

The Dunlop Geomax MX34 Rear Tire (size 110/90-19) is an elite soft-to-intermediate motocross rear tire engineered to replace worn stock tires with hole-shot-winning acceleration, aggressive braking bite, and class-leading corner-exit traction. Designed specifically for 250cc and 450cc motocross machines utilizing 19-inch rear wheels, the MX34 builds upon Dunlop's factory racing heritage with an updated tread block pattern that evacuates mud efficiently while generating immense mechanical drive out of soft berms and deep ruts. The MX34 rear features an optimized block spacing pattern with an 11% taller and 44% wider center knob profile compared to its predecessor. This provides a substantially larger rubber contact patch when applying power in a straight line. Dunlop's patented Progressive Cornering Block Technology (PCBT) on the shoulder knobs enhances lateral grip when railing deep ruts or leaning heavily on flat turns. The casing utilizes Dunlop's Carcass Tension Control System (CTCS), which tunes flex zones across the tire profile to absorb vertical impacts and track chatter, keeping the rear wheel glued to the dirt under heavy throttle applications. ### Technical Specifications & Engineering Specs - **Tire Size**: 110/90-19 (Standard 19" rear motocross rim) - **Terrain Application**: Soft, loam, deep sand, muddy ruts, and intermediate soil - **Knob Architecture**: 11% taller center blocks with PCBT shoulder knob-in-a-knob design - **Carcass**: Optimized multi-ply casing with tuned tension zones - **Mud Evacuation**: Widened void ratio for self-cleaning centrifugal mud shedding ### Step-by-Step Installation & Safety Protocols Installation requires heavy-duty tire irons, soapy water lubricant, and a sturdy tire stand. Disassemble the rear wheel, remove the valve core, loosen the rim lock nut, and break the tire bead. Work the tire spoons around the rim circumference to remove the old tire. Inspect the rim tape and rim lock. Coat the beads of the MX34 with bead lubricant. Position the tire matching the directional arrow on the sidewall, insert the heavy-duty tube or bib mousse, push the valve stem through the rim hole, and lever the first bead onto the rim. Carefully spoon the second bead over the wheel lip, ensuring you do not pinch the tube with the tire irons. Inflate to 32 PSI until both beads pop securely onto the rim seat, verify the bead line is concentric around the rim, adjust pressure to 12.0-13.5 PSI, and tighten the rim lock nut to 14-16 Nm. ### Maintenance & Service Life Maintenance consists of regular pressure checks, checking for cracked or missing knobs after rocky motos, and rotating the tire on the rim if directional wear causes rounding of the driving edges. ### Frequently Asked Questions **Will a 110/90-19 size tire fit my 250F and 450F motocross bike?** Yes. The 110/90-19 is standard rear sizing on modern 250F motocross machines and is widely used on 450F machines by riders seeking agile handling and rapid corner turnover. **How does the MX34 improve mud evacuation?** The new tread design features wider void spacing between the center and shoulder knobs, which utilizes centrifugal wheel force to shed sticky clay and loam, preventing the tire from packing up into a slick. **Can I run a bib mousse insert inside the Dunlop MX34?** Yes. The MX34's reinforced carcass is fully compatible with standard 110/90-19 bib mousse foam inserts, making it a popular choice for off-road and cross-country racing where flat protection is paramount. **How many race hours can I expect from the MX34 rear?** On loam and soft tracks, the MX34 provides 15 to 25 hours of peak racing bite; on abrasive hard tracks, inspect edge sharpness periodically and flip the tire to refresh the leading edge.

MSRP: $169.95 $135.96
FMF Factory 4.1 RCT Titanium Slip-On - FMF aftermarket dirt bike part
20% OFF
Exhaust Systems

FMF Factory 4.1 RCT Titanium Slip-On

The FMF Factory 4.1 RCT Titanium Slip-On Silencer is a premier competition exhaust upgrade engineered to replace heavy, restrictive OEM four-stroke mufflers with an ultralight, race-calibrated sound and power solution. Incorporating FMF's patented Resonance Chamber Technology (RCT), the internal core geometry reduces sound output while optimizing pressure waves to expand power output across the entire RPM range. By positioning the internal core closer to the engine and utilizing an aggressive series of internal orifices, the 4.1 RCT shortens overall canister length, concentrating exhaust mass closer to the motorcycle's center of gravity for improved chassis handling in corners. Constructed from aerospace-grade American titanium, the silencer canister and mid-pipe provide exceptional heat dissipation and significant weight savings compared to stock aluminum-and-steel assemblies. The end cap is crafted from high-temperature carbon fiber with titanium fastening hardware. On the track, riders experience crisp, immediate throttle response at low RPM, stronger mid-range pull out of tight berms, and broad top-end over-rev that eliminates the early power drop-off common to corked-up OEM mufflers. The Factory 4.1 RCT features FMF's Rapid Tuning System (RTS), enabling quick installation of quiet insert screens or USFS-approved spark arrestor screens via a single end cap retaining bolt. ### Technical Specifications & Engineering Specs - **Canister Material**: Aerospace-grade American titanium alloy - **End Cap**: High-temperature multi-layer carbon fiber with titanium rivets - **Mid-Pipe**: Precision mandrel-bent titanium with CNC machined slip-joint collar - **Internal Core**: Stepped stainless steel perforated core with Resonance Chamber Technology (RCT) - **Included Inserts**: Removable 94dB sound insert and USFS-approved spark arrestor screen ### Step-by-Step Installation & Safety Protocols Installation connects directly to the OEM header or matching FMF Megabomb header. Begin by removing the side number plate and loosening the mid-pipe clamp. Remove the subframe mounting bolts and pull the stock muffler away. Clean the header outlet pipe of old gasket material. Apply a thin film of high-temperature copper RTV silicone to the slip-fit joint if necessary, slide the FMF titanium mid-pipe over the header outlet, and loosely install the subframe mounting bolts with the provided rubber vibration isolators. Align the canister so it clears the rear brake caliper and swingarm through full suspension compression, then tighten the clamp and subframe bolts to 18-22 Nm. Reinstall the plastic side panel, ensuring at least 15mm clearance to prevent heat melting. ### Maintenance & Service Intervals Maintenance involves periodically inspecting the titanium canister and repacking the internal fiberglass cartridge every 20-30 engine hours. As exhaust packing burns away, sound levels increase and internal heat can discolor or damage the titanium shell. Clean the raw titanium with contact cleaner or WD-40 when cool; never use abrasive scouring pads on titanium surfaces. ### Frequently Asked Questions **Does the FMF Factory 4.1 RCT slip-on fit the stock OEM header?** Yes, FMF designs the Factory 4.1 RCT slip-on to connect seamlessly with either the factory OEM header pipe or an aftermarket FMF Megabomb/Powerbomb header. **How often should I repack the FMF silencer?** FMF recommends inspecting and repacking four-stroke silencers every 20 to 30 operating hours to maintain optimal backpressure, preserve sound compliance, and prevent excessive heat buildup on the canister wall. **Is a spark arrestor included with the 4.1 RCT Titanium Slip-On?** The Factory 4.1 RCT comes with a removable USFS-approved spark arrestor screen insert and a sound-dampening quiet insert that can be swapped using basic hand tools. **What is the weight reduction compared to stock?** Depending on the specific motorcycle model, the FMF Factory 4.1 RCT Titanium Slip-On typically saves between 1.5 and 2.5 pounds over heavy stock OEM steel-and-aluminum silencer assemblies.

MSRP: $599.99 $479.99
FMF Gnarly 2-Stroke Pipe - FMF aftermarket dirt bike part
20% OFF
Exhaust Systems

FMF Gnarly 2-Stroke Pipe

The FMF Gnarly 2-Stroke Exhaust Pipe is the legendary heavy-duty expansion chamber engineered for modern two-stroke motocross and enduro riders who demand rugged rock impact protection and enhanced low-to-midrange torque delivery. Standard OEM two-stroke pipes are stamped from lightweight 20-gauge or 22-gauge steel, leaving them extremely vulnerable to roost dents, boulder crushes, and log strikes that restrict exhaust airflow and ruin engine performance. The FMF Gnarly resolves this by utilizing rugged, heavy-duty 18-gauge steel construction throughout the entire chamber body. The engineered geometry of the Gnarly pipe alters the internal pressure wave reflection timing within the convergent and divergent cones. By tailoring the acoustic return wave to arrive earlier at the exhaust port, the Gnarly dramatically boosts bottom-end pull, tractor-like grunt, and strong midrange power delivery, transforming high-revving two-strokes into smooth, manageable woods and hard-enduro conquerors. The exterior is finished with FMF's durable nickel-plating process, which resists surface rust, corrosion, and mud staining, maintaining a bright, professional finish season after season. ### Technical Specifications & Engineering Specs - **Material Construction**: Super-tough 18-gauge heavy-duty stamped carbon steel - **Surface Finish**: Bright nickel-plated corrosion-resistant coating - **Power Curve Profile**: Bottom-end and midrange torque emphasis for woods and technical terrain - **Sealing System**: Dual high-temperature Viton O-ring manifold spout interface - **Welding**: Precision hand-welded stamped cone seams ### Step-by-Step Installation & Safety Protocols Installation begins with removing the existing pipe and springs using an exhaust spring puller tool. Remove the silencer connection and frame mounting bolts. Inspect the rubber vibration dampers on the frame mounts and replace any that are perished. Replace the high-temperature Viton O-rings inside the cylinder exhaust manifold spout. Apply high-temperature grease to the new O-rings and slide the FMF Gnarly pipe spigot into the cylinder exhaust port. Secure the pipe using fresh swivel-hook exhaust springs. Align the rear stinger outlet with the silencer rubber coupler, loosely install all frame mounting bolts, ensure the pipe does not rub against the radiator or frame cradle, and tighten all hardware to 18-20 Nm. ### Maintenance & Rust Prevention Maintenance involves checking exhaust manifold O-rings for oil weeping (indicating exhaust seal wear) and washing the nickel-plated surface with standard soap and water. Minor carbon buildup inside the chamber can be flushed during annual rebuilds. ### Frequently Asked Questions **Does the Gnarly pipe reduce top-end power on a two-stroke?** Because the Gnarly is tuned to deliver massive bottom-end and midrange tractability, it shifts the power curve downward, slightly softening extreme top-end over-rev in exchange for superior lugging capability in technical terrain. **What is the thickness of the steel used in the FMF Gnarly?** The Gnarly is stamped from robust 18-gauge steel, making it substantially thicker and more dent-resistant than stock OEM pipes or standard lightweight race pipes. **Do I need to re-jet or re-map my carburetor/EFI system with the Gnarly?** In most applications with modern fuel injection (TPI/TBI) or standard jetting, the Gnarly runs smoothly on baseline settings, but rich conditions in humid or high-altitude environments may benefit from one clip position leaner on the needle or a slight fuel trim adjustment. **Will the Gnarly pipe mate to my stock silencer?** Yes. The Gnarly pipe is engineered with standard factory stinger dimensions, allowing it to connect directly to the OEM silencer or any FMF two-stroke silencer (Powercore 2, Turbinecore 2, or Shorty).

MSRP: $289.99 $231.99
FMF Megabomb Titanium Header - FMF aftermarket dirt bike part
20% OFF
Exhaust Systems

FMF Megabomb Titanium Header

The FMF Megabomb Titanium Header is a patented, high-performance exhaust header engineered to replace straight-pipe OEM headers, unlocking significant mid-to-top end power gains while lowering exhaust decibel output. The defining engineering feature of the Megabomb is its enlarged secondary expansion module located along the primary pipe. This scientifically calculated chamber acts as an acoustic diffuser and exhaust pulse resonator, allowing high-velocity exhaust gases to expand and decelerate momentarily before converging back into the main stream. Fabricated exclusively from premium aerospace-grade titanium, the Megabomb delivers an impressive strength-to-weight ratio and rapid thermal dissipation. The resonance effect creates an effective exhaust scavenging pulse that extracts residual exhaust gases from the combustion chamber more thoroughly during the valve overlap phase. On the track, this mechanical scavenging translates to noticeable low-end torque improvement, enhanced mid-range throttle response, and a reduction in exhaust noise by up to 1.5 dB. The lower acoustic footprint provides a deeper, throatier exhaust tone while reducing rider acoustic fatigue during long motos. ### Technical Specifications & Engineering Specs - **Material**: Aerospace-grade lightweight titanium alloy - **Chamber Design**: Patented Megabomb sonic diffuser expansion chamber - **Header Geometry**: Precision mandrel-bent stepped diameter profile - **Flange Type**: CNC-machined titanium cylinder head mounting collar - **Sound Attenuation**: Lowers exhaust sound output by up to 1.5 dB across operating RPMs ### Step-by-Step Installation & Safety Protocols Installation requires careful attention to exhaust sealing and engine clearance. Remove the right-side shrouds, side panel, and disconnect the existing header from the cylinder head exhaust port and mid-pipe junction. Inspect the copper exhaust port crush gasket inside the cylinder head; always replace with a new OEM crush gasket to guarantee an airtight seal. Mount the FMF Megabomb header loosely onto the exhaust studs using factory flange nuts. Connect the mid-pipe, align the header to ensure adequate clearance around radiator hoses and the frame downtube, and tighten the cylinder head exhaust flange nuts evenly to 12-15 Nm (do not over-tighten, which can strip cylinder head studs). Wipe down the titanium tubing with rubbing alcohol before starting the engine to remove fingerprints, which will permanently bake into the titanium finish. ### Maintenance & Inspection Guidelines Maintenance includes inspecting the header for dents from front-wheel roost and checking flange nuts periodically for proper torque. Clean with mild soap or rubbing alcohol when cold to maintain the natural titanium heat-anodized finish. ### Frequently Asked Questions **How does the Megabomb header lower sound while making more power?** The patented expansion chamber increases the internal surface area and changes the acoustic frequency of the exhaust pulse, effectively dissipating sound waves while creating an optimal low-pressure scavenging wave that pulls more fresh fuel-air charge into the cylinder. **Will the FMF Megabomb header work with my stock OEM silencer?** Yes, the Megabomb is designed with factory-matched inlet and outlet diameters, allowing it to pair with either the OEM silencer or an aftermarket FMF Factory 4.1 RCT slip-on. **Why is it critical to clean the header before the first engine run?** Fingerprints contain natural skin oils that permanently burn into raw titanium under extreme exhaust temperatures, causing permanent stained blotches. Cleaning with isopropyl alcohol ensures a clean, uniform gold-and-blue heat color transition. **Does the Megabomb interfere with aftermarket skid plates or oversized radiators?** FMF designs the Megabomb header to closely follow factory routing, providing ample clearance for standard aftermarket skid plates, engine guards, and radiator braces.

MSRP: $349.99 $279.99
Flo Motorsports Folding Clutch Lever - Flo Motorsports aftermarket dirt bike part
20% OFF
Handlebars & Controls

Flo Motorsports Folding Clutch Lever

The Flo Motorsports Folding Clutch Lever is an essential durability upgrade engineered to replace brittle cast OEM clutch levers that frequently snap off during minor spills and tip-overs. CNC-machined from aircraft-grade 6061-T6 billet aluminum, this lever features a precision spring-loaded pivot mechanism that allows the blade to fold outward and forward 90 degrees during an impact, absorbing the kinetic energy and instantly springing back to its functional position once the bike is picked up. The lever blade is ergonomically contoured with rounded edges and a textured ball end to deliver smooth, fatigue-free clutch modulation across two-finger and three-finger pulling techniques. It incorporates an on-the-fly adjustable reach mechanism: by turning the stainless steel indexing dial, riders can fine-tune the exact distance between the handlebar grip and the lever blade to accommodate varying hand sizes and glove thicknesses. Sealed ball bearings inside the pivot joint eliminate vertical blade play, providing a crisp, slop-free lever pull that enhances clutch engagement feel at the start gate and in technical terrain. ### Technical Specifications & Engineering Specs - **Material**: CNC-machined 6061-T6 billet aluminum - **Pivot Action**: 90-degree forward/outward spring-loaded breakaway folding mechanism - **Hardware**: Stainless steel pivot pins, detents, and return springs - **Reach Adjustment**: Multi-position indexing set dial - **Finish**: Anodized protective coating with laser-etched Flo Motorsports logo ### Step-by-Step Installation & Safety Protocols Installation takes approximately 10 to 15 minutes using basic hand tools. Loosen the cable barrel adjuster at the clutch perch to create maximum cable slack. Pivot the stock lever forward to release the clutch cable barrel end from the lower lever pocket. Remove the main pivot bolt and nut, taking care not to lose any internal spacer bushings. Clean the perch interior, apply a light coat of lithium grease to the pivot bushing, and insert the Flo Motorsports lever. Reconnect the cable barrel, reinstall the pivot bolt, and torque the locknut to 6-8 Nm (do not over-tighten, which causes binding). Adjust cable free play at the barrel adjuster to maintain 2-3mm of lever slack before clutch engagement. ### Maintenance & Service Lifespan Maintenance requires inspecting the pivot joint for grit accumulation after muddy events. Clean with contact cleaner and lubricate the folding hinge with silicone spray. Check the pivot bolt locknut tightness periodically. ### Frequently Asked Questions **Will this folding lever fit into my stock OEM clutch perch?** Yes. This Flo Motorsports Folding Clutch Lever is specifically engineered to fit the factory OEM cable clutch perch with perfect tolerance and bushing alignment. **How does the adjustable reach mechanism work?** A stainless steel set screw with an indexed detent wheel allows you to increase or decrease the resting distance of the lever blade relative to the handlebar, giving custom lever positioning for small or large hands. **What prevents the lever from folding when I pull the clutch?** The folding mechanism only pivots outward in the direction of an external crash impact. When pulling inward toward the handlebar, the lever locks against a solid machined stop, providing 100% positive force transfer. **How does the sealed pivot bearing improve clutch modulation?** The internal sealed ball bearing eliminates vertical wobble and friction at the pivot bolt, creating an ultra-smooth, linear lever pull that makes finding the clutch friction point effortless.

MSRP: $79.95 $63.96
Flo Motorsports Pro Series Footpegs - Flo Motorsports aftermarket dirt bike part
20% OFF
Handlebars & Controls

Flo Motorsports Pro Series Footpegs

The Flo Motorsports Pro Series Footpegs are high-grade aftermarket footpegs designed to replace narrow, slippery OEM steel pegs that pack with mud and offer inadequate platform stability. Machined from solid aerospace-grade 7075-T6 billet aluminum, these pegs provide an exceptionally strong, lightweight foundation that withstands massive casing impacts and aggressive riding without bending or snapping. Measuring a generous 57mm wide by 86mm long, the wide platform dramatically increases the contact patch between the rider's boot sole and the machine. The Pro Series pegs feature replaceable stainless steel cleats with an aggressive cone-tooth design. These sharp teeth lock into motocross boot treads, preventing feet from slipping off the pegs during muddy ruts, hard landings, or wet off-road conditions. Internal cavity cutouts are engineered with open relief channels that prevent mud and clay from packing underneath the boot, allowing debris to fall through continuously. On the track, the rider experiences superior chassis feedback, effortless weight transfer through corners, and significantly reduced foot fatigue during long motos. ### Technical Specifications & Engineering Specs - **Platform Dimensions**: 57mm width x 86mm overall length - **Material**: Solid CNC-machined 7075-T6 billet aluminum - **Traction Cleats**: Replaceable cone-point stainless steel cleats with pre-applied thread lock - **Debris Evacuation**: Open-truss center cavity for maximum mud shed - **Weight**: Approx. 380 grams per pair (significantly lighter than steel OEM units) ### Step-by-Step Installation & Safety Protocols Installation is straightforward and utilizes the factory footpeg pins, return springs, and cotter pins. Begin by removing the cotter pin or circlip from the bottom of the stock footpeg pivot pin, then slide the pin out while retaining the OEM spring. Clean the frame clevis area and apply fresh waterproof grease to the pivot pin. Position the Flo Motorsports peg into the clevis along with the spring, align the pivot holes, and slide the pin downward. Secure the pin with a new stainless steel cotter pin, bending the legs securely. Verify that the footpeg pivots upward smoothly and returns instantly via spring tension. ### Maintenance & Cleat Replacement Maintenance involves checking the tightness of the stainless steel cleat screws before riding (loctite is pre-applied, but routine torque checks are recommended) and replacing worn cleats as teeth become rounded over time. Inspect the frame clevis for wear and replace pivot pins if grooved. ### Frequently Asked Questions **Are the stainless steel teeth replaceable when they wear down?** Yes, Flo Motorsports provides replacement tooth cleat kits with fresh stainless steel hardware, so you can restore maximum grip without replacing the entire aluminum peg body. **Do these footpegs lower or raise my riding position?** Flo Pro Series pegs feature a standard OEM height profile, maintaining factory ergonomics while providing a much broader and more stable platform. **Can I adjust the angle of the footpegs?** Certain Flo Pro Series models feature adjustable clevis hardware allowing minor tilt adjustments; standard models maintain factory perpendicular alignment for optimum boot contact. **How does 7075-T6 aluminum compare to standard cast steel pegs?** 7075-T6 aluminum delivers comparable structural yield strength to carbon steel at roughly half the weight, while offering superior resistance to bending under violent casing impacts.

MSRP: $149.95 $119.96
Flo Motorsports Radiator Braces - Flo Motorsports aftermarket dirt bike part
20% OFF
Protection

Flo Motorsports Radiator Braces

The Flo Motorsports Pro Series Radiator Braces are essential heavy-duty protection components engineered to safeguard expensive, fragile aluminum radiators from catastrophic crushing and bending during tip-overs, side impacts, and tree strikes. Motorcycle radiators are constructed from delicate brazed aluminum with ultra-thin cooling fins; a minor crash can twist the core, rupture the coolant tank, and end your riding day with an overheated engine. Flo Motorsports braces provide an impenetrable structural roll-cage around your radiators. CNC-machined from 4mm thick high-strength 6061-T6 billet aluminum, Flo Motorsports radiator braces feature a multi-point triangulated support structure. Unlike cheap stamped brackets that only support the rear of the radiator, Flo's design wraps completely around the perimeter of the radiator core and anchors firmly to both the front frame downtube and the radiator mounting lugs. This creates a rigid cage that distributes side-impact forces across the main frame rather than crushing the radiator core. The open-mesh design maximizes unobstructed airflow through the cooling fins, preventing engine overheating during hot, low-speed trail riding. ### Technical Specifications & Engineering Specs - **Material**: 4.0mm CNC-machined 6061-T6 billet aircraft aluminum - **Structural Architecture**: Triangulated perimeter roll-cage with front and rear tie-plates - **Airflow Efficiency**: High-flow open window profile maintains 100% cooling capacity - **Hardware**: Stainless steel high-tensile mounting bolts and threaded frame spacers - **Finish**: Anodized protective finish in silver, black, or factory-matched colors ### Step-by-Step Installation & Safety Protocols Installation requires basic metric hand tools. Remove the front seat and radiator plastic shrouds. Drain coolant only if your specific model requires removing radiator hoses for bracket access (most models install with hoses in place). Unbolt the radiators from the frame tabs. Position the Flo Motorsports inner support brackets against the frame, align the outer cage braces around the radiator tanks, and reassemble using the supplied high-tensile stainless steel hardware. Torque all mounting bolts to 10-12 Nm. Reinstall the plastic radiator shrouds, which bolt directly into the outer face of the Flo braces. ### Maintenance & Crash Inspection Maintenance involves inspecting the braces for straightness after crashes and checking mounting hardware tightness during routine service. ### Frequently Asked Questions **Do Flo Motorsports Radiator Braces restrict cooling airflow?** No. The braces are engineered with CAD-optimized airflow cutouts that allow maximum air penetration into the radiator cooling fins without causing engine temperature increases. **Will my stock plastic radiator shrouds fit over these braces?** Yes. Flo Motorsports braces are designed to maintain factory shroud mounting geometry, allowing your OEM or aftermarket plastics to bolt on without trimming or bending. **Can these braces be used if my radiators are already slightly bent?** Radiators must be reasonably straight to align with the precision mounting holes of the braces. If slightly twisted, gently straighten the radiator tanks before installing the braces. **How do these braces attach to the motorcycle frame?** The braces anchor securely to both the factory radiator frame mounting tabs and the front frame cradle downtube, creating a multi-point truss that disperses impact energy.

MSRP: $119.95 $95.96
Galfer Rear Wave Brake Rotor - Galfer aftermarket dirt bike part
20% OFF
Braking

Galfer Rear Wave Brake Rotor

The Galfer Rear Wave Solid Brake Rotor is a high-performance, heat-dissipating rear brake disc engineered to replace solid OEM rear rotors that suffer from overheating, brake fade, and premature pad glazing. In off-road and motocross riding, the rear brake is subjected to continuous drag and heavy modulation in tight ruts and downhill descents. Factory round rotors trap heat and pad debris, causing the hydraulic brake fluid to boil and resulting in a spongy, useless rear brake pedal. Galfer's Wave rotor design completely transforms rear braking consistency. Manufactured in Spain from high-carbon 420 stainless steel, the rotor is laser cut and double-disc ground to ensure absolute parallel flatness and zero runout. The patented Wave design introduces a non-concentric outer edge that constantly alters the contact radius across the brake pads. This wiping action continuously cleans pad surfaces, clears away mud and glaze, and allows air to penetrate the pad-rotor contact interface. The result is a rear brake with crisp pedal feel, progressive modulation that prevents accidental rear wheel lockup, and dramatically reduced operating temperatures during long downhill sections. ### Technical Specifications & Engineering Specs - **Material**: High-carbon 420 virgin stainless steel - **Design Pattern**: Patented Galfer Wave contour with optimized thermal dissipation - **Surface Machining**: Double-disc parallel ground to eliminate disc thickness variation - **Heat Treatment**: Pre-heat treated to eliminate warping under extreme track temperatures - **Origin**: Precision manufactured in Spain ### Step-by-Step Installation & Safety Protocols Installation is performed during a rear wheel removal. Remove the rear wheel and extract the four or six factory rear rotor bolts. Clean the hub mounting flange thoroughly of grit and old thread locker. Position the Galfer Wave rotor onto the hub, ensuring the laser-etched rotation arrow points in the direction of forward wheel rotation. Apply medium-strength thread locker to the rotor bolts and torque in a criss-cross pattern to factory specification (typically 14-16 Nm). Reinstall the rear wheel, aligning the rotor between the rear brake pads. Pump the rear brake pedal until firm before riding. ### Maintenance & Service Wear Limits Maintenance involves checking rotor thickness periodically with a vernier caliper and replacing the rotor if worn below the minimum thickness threshold stamped on the disc face (typically 3.5mm). ### Frequently Asked Questions **How does the Wave shape prevent rear brake fading?** The undulating outer and inner edges maximize surface area for convective air cooling while continuously wiping away thermal gases and debris from the brake pad surface, preventing brake fade and fluid boiling. **Can I run standard OEM brake pads with the Galfer Wave rotor?** Yes, the Galfer rotor is fully compatible with OEM pads, though pairing with Galfer sintered brake pads delivers the highest braking performance and pad longevity. **Does this rotor wear brake pads faster?** No. Galfer's parallel grinding and high-carbon steel composition provide a smooth, uniform friction surface that promotes even pad wear without grooving. **Why is rear brake modulation so critical on a dirt bike?** A predictable, modulated rear brake allows you to settle the chassis into rutted corners and control downhill descent speeds without locking up the rear wheel and stalling the engine.

MSRP: $149.00 $119.20
Galfer Tsunami Oversized Front Rotor Kit - Galfer aftermarket dirt bike part
20% OFF
Braking

Galfer Tsunami Oversized Front Rotor Kit

The Galfer Tsunami Oversized 270mm Front Rotor Kit is an elite braking performance upgrade engineered to replace standard 240mm-260mm OEM front brake rotors, providing massive stopping power, precise two-finger lever modulation, and exceptional heat dissipation. Modern four-stroke motocross and off-road bikes generate intense kinetic energy; stock solid rotors quickly overheat during aggressive downhill braking or hard moto entry, leading to lever fade, fluid boiling, and unpredictable stopping distances. The Galfer Tsunami oversized kit solves this by increasing braking leverage and cooling efficiency. The Tsunami rotor is laser-cut from Galfer's proprietary high-carbon 420 virgin stainless steel, pre-heat treated, and double-disc ground parallel to achieve perfect flatness. The patented Tsunami wave pattern utilizes aggressive scalloped outer edges and cooling vent cutouts that continuously sweep brake pad surfaces clean of glaze, mud, and water while maximizing surface area exposure to ambient air. The kit includes a precision CNC-machined 6061-T6 aluminum caliper relocating bracket with hard anodizing, which repositions the OEM front brake caliper outward to accommodate the larger 270mm diameter rotor, delivering an instant 20-30% increase in braking leverage. ### Technical Specifications & Engineering Specs - **Rotor Diameter**: 270mm oversized racing diameter - **Blade Material**: High-carbon 420 virgin stainless steel, laser cut and heat treated - **Grinding Process**: Double-disc parallel ground for zero runout (<0.002mm) - **Relocating Bracket**: CNC-machined 6061-T6 aerospace aluminum with hard anodize - **Pad Cleaning Action**: Patented Tsunami outer wave contour continuously deburrs pad glaze ### Step-by-Step Installation & Safety Protocols Installation requires standard metric wrenches and blue thread locker. Remove the front wheel and unbolt the factory rotor from the hub. Clean the hub mounting face. Place the Galfer 270mm rotor against the hub with the directional rotation arrow aligned with forward rotation. Apply medium-strength thread locker to new rotor bolts and torque in a star pattern to 14-16 Nm. Unbolt the stock caliper bracket from the fork lug and install the Galfer relocating bracket, torquing to 22-25 Nm. Reinstall the front wheel, ensuring the rotor slides between the brake pads. Pump the front brake lever until firm before riding. ### Maintenance & Bed-In Procedure Maintenance involves measuring rotor thickness with a micrometer (replace if worn below minimum stamped thickness, typically 2.5mm) and bedding in new brake pads with 10-15 progressive moderate stops. ### Frequently Asked Questions **Why does an oversized 270mm rotor stop the bike faster?** Increasing the rotor diameter moves the brake caliper further outward from the axle centerline, creating greater mechanical leverage (torque) over the spinning wheel with less required hand effort. **Do I need a new brake caliper to run this 270mm kit?** No. The included Galfer relocating bracket allows you to reuse your factory OEM brake caliper and hydraulic lines. **What brake pads work best with the Galfer Tsunami rotor?** Galfer sintered semi-metallic brake pads provide the ultimate combination of high-friction bite, progressive modulation, and fade resistance in wet and dry conditions. **How does the Tsunami wave design prevent brake fade?** The aggressive edge scallops create convective air turbulence across the brake pads while expelling heat and friction gases outward, keeping brake fluid temperatures well below boiling point.

MSRP: $289.00 $231.20
Honda HRC Race ECU Camshaft Kit - Honda aftermarket dirt bike part
20% OFF
Engine Rebuild Kits

Honda HRC Race ECU Camshaft Kit

The Honda HRC Race ECU & Performance Camshaft Kit is a factory competition power package engineered directly by Honda Racing Corporation (HRC) to elevate the CRF450R and CRF450RX to professional Supercross and Pro Motocross performance levels. While stock production 450 engines are calibrated to balance EPA sound/emissions and broad amateur rideability, the HRC Race Kit reprograms the engine's fueling and ignition maps while increasing valve lift and duration for maximum competition power delivery. The kit includes an HRC factory-programmed electronic control unit (ECU) with dedicated competition fuel and ignition timing curves, as well as a precision-ground HRC billet steel high-performance camshaft. The HRC camshaft features revised intake and exhaust lobe profiles that increase valve overlap and lift, allowing the combustion chamber to draw in significantly higher air-fuel volume at high RPMs. The matching HRC ECU modifies the rev limiter ceiling, eliminates stock emissions flat-spots, and features three specialized handlebar-switchable engine maps (Map 1: Smooth / Map 2: Aggressive / Map 3: Hole-shot optimized) with refined traction control and launch control algorithms. On the track, riders experience violent yet tractable midrange acceleration and broad, unyielding top-end over-rev. ### Technical Specifications & Engineering Specs - **ECU Calibration**: HRC competition factory fuel and ignition timing profiles - **Camshaft Material**: Precision CNC-ground billet steel alloy - **Engine Maps**: 3 Handlebar-selectable modes (Smooth, Linear Race, Aggressive Holeshot) - **Launch & Traction Control**: HRC-refined multi-stage launch control RPM algorithms - **Direct Integration**: Factory plug-and-play wiring harness integration ### Step-by-Step Installation & Safety Protocols > [!CAUTION] > Safety & Installation Notice: Camshaft installation and ECU calibration require advanced engine mechanical knowledge and precision valve-shimming equipment. Improper camshaft timing or incorrect valve clearance can cause severe engine damage. Professional installation by an authorized technician is strongly recommended. Installation involves disassembling the cylinder head cover, setting the engine to TDC on the compression stroke, relieving cam chain tension, and removing the factory camshaft. Install the HRC camshaft, applying assembly lube to the lobes and journals. Check valve clearances with feeler gauges, adjusting valve shims to HRC specifications (typically 0.16mm intake, 0.28mm exhaust). Align timing marks with extreme precision, reinstall the cam chain tensioner, and torque cam holder bolts in sequence to 10 Nm. Replace the stock ECU beneath the seat with the HRC Race ECU unit, verifying that all wiring harness connectors click securely into place. ### Maintenance & Valve Clearance Inspection Maintenance requires inspecting valve clearances after 10 hours of initial runtime and maintaining fresh oil. ### Frequently Asked Questions **Is the HRC Race ECU plug-and-play with the stock wiring harness?** Yes. The HRC ECU connects directly to the factory OEM wiring harness connectors and integrates with the handlebar map switch and launch control buttons. **Do I need high-octane race fuel to run this HRC kit?** While the kit can operate on fresh 93 octane pump gas on Map 1, Map 2 (Aggressive) is optimized for high-octane (98+ RON / 100+ octane) leaded or unleaded race fuels for maximum detonation resistance. **Does this kit retain the three handlebar-selectable maps?** Yes. The HRC ECU reprograms the three handlebar-switchable modes with factory race-calibrated profiles: standard, smooth/mud, and aggressive race modes. **What is the recommended valve clearance for the HRC camshaft?** Set intake valve clearance to 0.16mm ± 0.03mm and exhaust valve clearance to 0.28mm ± 0.03mm with the engine completely cold.

MSRP: $850.00 $680.00
Husqvarna Factory Racing Titanium Pegs - Husqvarna aftermarket dirt bike part
20% OFF
Handlebars & Controls

Husqvarna Factory Racing Titanium Pegs

The Husqvarna Factory Racing Titanium Footpegs are the ultimate lightweight, high-traction foot controls engineered directly by Husqvarna's factory racing division to replace heavy steel OEM footpegs on modern Husqvarna and KTM motorcycles. Footpegs are the primary physical interface through which a rider steers and controls the machine; standard pegs are narrow, heavy, and wear down quickly, compromising boot traction in muddy or wet racing conditions. Precision-crafted from aerospace-grade Ti-6Al-4V titanium alloy, these factory pegs deliver an astonishing 40% weight reduction compared to standard steel pegs while offering virtually indestructible structural strength. The wide platform measures 60mm in width and features an aggressive perimeter array of sharp, pyramid-shaped titanium teeth. These teeth grip into the soles of motocross boots with relentless tenacity, ensuring the rider's feet never slip off the pegs during violent jump landings, deep rut carving, or slick muddy scrambles. The internal open-frame architecture features wide drainage ports that prevent mud, clay, and gravel from packing beneath the boot sole, keeping the pegs clear throughout long motos. ### Technical Specifications & Engineering Specs - **Material**: Aerospace-grade Ti-6Al-4V (Grade 5) titanium alloy - **Platform Dimensions**: 60mm extra-wide platform width x 85mm length - **Tooth Profile**: Precision pyramid-point perimeter teeth for maximum mechanical boot bite - **Mud Evacuation**: Open central truss design for continuous mud and debris shedding - **Weight**: Approx. 260 grams per pair (saving up to 40% over OEM cast steel footpegs) - **Mounting Clevis**: Direct factory OEM pin and spring fitment ### Step-by-Step Installation & Safety Protocols Installation utilizes the factory footpeg pins, return springs, and cotter pins. Remove the cotter pin from the lower end of the stock footpeg pivot pin, slide the pin upward, and remove the stock peg and spring. Clean the frame clevis thoroughly and coat the pivot pin in waterproof synthetic grease. Position the Husqvarna Titanium footpeg into the frame mount alongside the return spring, slide the pivot pin through, and install a new stainless steel cotter pin, spreading the legs securely. Verify that the footpeg pivots upward freely and snaps down instantly under spring tension. ### Maintenance & Care Routine Maintenance involves washing with standard soap and water. The Ti-6Al-4V titanium alloy is completely impervious to rust and chemical corrosion. Check the frame clevis pins periodically for wear. ### Frequently Asked Questions **How much weight do titanium footpegs save compared to stock steel pegs?** Husqvarna Factory Titanium pegs eliminate approximately 200 to 250 grams of unsprung weight from the motorcycle while providing a substantially larger boot contact area. **Will titanium footpegs rust or corrode from pressure washing?** No. Grade 5 Ti-6Al-4V titanium is completely rust-proof and highly resistant to all chemical washes, salt, and environmental corrosion. **Are these footpegs compatible with KTM and GASGAS models?** Yes. Modern Husqvarna, KTM, and GASGAS full-size motorcycles share identical frame clevis geometry, allowing direct bolt-on fitment across all Austrian-platform machines. **Do sharp titanium teeth damage motocross boot soles?** The pyramid teeth are shaped to grip the sole lugs securely without slicing through the boot shank, providing secure traction without premature boot wear. **Can these pegs bend in a high-speed rock strike?** Grade 5 titanium has extraordinary yield strength and elastic memory, withstanding severe rock strikes far beyond the yield point of cast steel or standard aluminum pegs.

MSRP: $249.00 $199.20
KTM SXS Factory Triple Clamps - KTM aftermarket dirt bike part
20% OFF
Suspension

KTM SXS Factory Triple Clamps

The KTM SXS Factory Adjustable Offset Triple Clamps are an elite factory racing chassis upgrade engineered to replace cast OEM triple clamps, providing tunable steering geometry, enhanced front-end traction, and reduced fork stiction for KTM and Husqvarna motocross and enduro motorcycles. Factory cast triple clamps are rigid and inflexible, often pinching the fork tubes under hard clamping loads and transmitting harsh vibrations into the rider's hands. KTM SXS Factory clamps solve this with CNC-machined aerospace billet aluminum and engineered flex zones. Machined from high-strength 7075-T6 billet aluminum and finished in KTM's iconic factory orange anodizing, the SXS triple clamps feature precise clamping bore geometry that distributes clamping pressure 360 degrees around the fork tubes, preventing fork binding and allowing the WP 48mm internal damping cartridges to stroke with zero stiction. The defining engineering feature is the adjustable steering stem offset: by loosening the bottom steering stem bolt and rotating the stem insert 180 degrees, riders can switch between a 20mm and 22mm offset. The 22mm setting provides rock-solid high-speed stability on fast rough tracks, while the 20mm setting shortens trail for razor-sharp steering in tight ruts and technical switchbacks. ### Technical Specifications & Engineering Specs - **Material**: 100% CNC-machined 7075-T6 aerospace billet aluminum - **Offset Adjustability**: Dual-offset geometry (Tunable between 20mm and 22mm offset) - **Fork Clamping Bore**: Precision-machined 48mm split clamping collars - **Finish**: Factory KTM hard-anodized orange coating - **Handlebar Mount**: Rubber-isolated bar mount pockets to isolate engine vibration ### Step-by-Step Installation & Safety Protocols Installation requires a motorcycle stand, steering stem socket, and torque wrench. Remove the front wheel, brake caliper, front fender, and fork legs. Unbolt the top steering stem nut and remove the stock triple clamps and stem bearings. Clean and pack the tapered steering stem bearings with fresh waterproof grease. Slide the KTM SXS bottom clamp and stem through the frame head tube. Install the upper clamp and torque the steering stem adjuster nut to set bearing preload (the handlebars should sweep smoothly with zero free play). Slide fork legs into the clamps to the desired line height. Torque upper clamp pinch bolts to 17 Nm and lower clamp pinch bolts to 12 Nm (do not over-torque lower bolts, which causes fork tube pinching). Reinstall the front wheel and brake assembly. ### Maintenance & Bearing Greasing Maintenance involves periodically checking steering stem bearing tightness and greasing bearings annually. ### Frequently Asked Questions **What is the practical difference between 20mm and 22mm offset?** A 22mm offset increases wheel trail, providing superior straight-line stability on fast, rough tracks. A 20mm offset decreases trail, making the front end turn into tight corners and ruts with less rider effort. **Why do the lower clamp bolts have a lower torque spec than the upper bolts?** The lower clamp surrounds the fork bushing area. Torquing lower bolts above 12 Nm can distort the outer fork tube, causing internal bushing friction and harsh fork action. **Are rubber handlebar mounting cones compatible with these clamps?** Yes. The upper clamp features factory rubber-isolated handlebar mounting pockets compatible with OEM KTM rubber cones or rigid aluminum bar mount inserts. **Can these clamps be installed on WP XACT Air and Spring forks?** Yes. The 48mm clamping diameter is identical across all WP XACT air and cone-valve/spring fork models.

MSRP: $599.99 $479.99
Kawasaki KXF Pro Circuit Linkage Arm - Kawasaki aftermarket dirt bike part
20% OFF
Suspension

Kawasaki KXF Pro Circuit Linkage Arm

The Kawasaki KXF Pro Circuit Suspension Linkage Arm is a precision-engineered chassis handling upgrade developed directly with the Monster Energy Pro Circuit Kawasaki factory racing team to optimize the rear suspension geometry on KX250 and KX450 motorcycles. Stock Kawasaki rear suspension linkages feature a rising-rate curve that causes the rear end to feel high, stiff, and busy over initial braking bumps, often resulting in a harsh, unsettled chassis when entering rough corners and high-speed sweepers. CNC-machined in the USA from solid 6061-T6 billet aluminum and finished in a rich clear or bronze hard anodizing, the Pro Circuit Linkage Arm is slightly longer than the OEM link arm. This subtle change in pivot geometry lowers the rear ride height of the chassis by approximately 5mm to 10mm, placing more chassis weight onto the rear wheel for enhanced squat traction under acceleration while relaxing the steering head angle slightly for superior high-speed straight-line stability. The revised progression curve makes the initial stroke of the rear shock plusher over small chop, while stiffening the final stroke to prevent harsh bottoming on big jump landings. ### Technical Specifications & Engineering Specs - **Material**: CNC-machined 6061-T6 billet aircraft aluminum - **Geometry**: Extended eye-to-eye length (lowers rear chassis height by 5-10mm) - **Bearings**: Pre-installed OEM-grade needle roller bearings and dual-lip dust seals - **Finish**: Military-spec hard anodized bronze/clear coating - **Championship Pedigree**: Developed with Monster Energy Pro Circuit Kawasaki race team ### Step-by-Step Installation & Safety Protocols Installation requires a motorcycle center stand, 17mm and 19mm sockets, and a torque wrench. Place the motorcycle on a stand with the rear wheel suspended off the ground. Remove the two linkage pivot bolts connecting the link arm to the swingarm and shock knuckle. Extract the stock link arm. Clean the knuckle area and inspect the needle bearings and seals. The Pro Circuit linkage comes pre-assembled with premium needle roller bearings and dual-lip dust seals. Apply fresh waterproof grease to the bearing rollers, install the Pro Circuit link arm, and insert the factory pivot bolts. Torque the linkage bolts to factory specification (typically 80 to 90 Nm). Reset rear shock sag (recommended 102-105mm of race sag) to compensate for the lowered ride height. ### Maintenance & Bearing Greasing Maintenance consists of disassembling, cleaning, and re-greasing the needle bearings every 20-30 operating hours. ### Frequently Asked Questions **How does changing linkage length improve cornering on a KXF?** Lowering the rear chassis and balancing the bike's front-to-rear stance allows the rear tire to track deeper in ruts without kicking or wallowing, giving the rider confidence to roll on throttle earlier out of turns. **Are the needle bearings pre-installed in the Pro Circuit link arm?** Yes. The link arm comes fully equipped with pre-installed OEM-grade needle roller bearings and dust seals, ready for greasing and immediate installation. **Do I need to re-valve my rear shock when installing this linkage?** No. The Pro Circuit linkage is designed to work effectively with stock shock valving and spring rates, though resetting your shock race sag is required. **What is the recommended race sag when using this link arm?** Set rear suspension race sag between 102mm and 105mm with the rider in full gear on the bike in attack position.

MSRP: $225.00 $180.00
Michelin StarCross 6 Hard Rear Tire - Michelin aftermarket dirt bike part
20% OFF
Tires

Michelin StarCross 6 Hard Rear Tire

The Michelin StarCross 6 Hard Rear Tire (size 110/90-19) is a specialized, ultra-durable motocross rear tire engineered for hard-packed clay, baked summer tracks, blue-groove surfaces, and stony off-road circuits where standard soft-compound tires quickly chunk knobs and lose drive. Replacing tires that wear out prematurely on abrasive ground, the StarCross 6 Hard utilizes Michelin's Silica Technology blended into an ultra-tough, high-density tread compound that resists tearing and abrasion under extreme acceleration. The tread block pattern features wide, reinforced rectangular center blocks that maximize rubber-to-ground contact on hard surfaces, providing relentless forward propulsion out of corners and high stability under heavy rear braking. Adaptive Design block siping creates micro-edges that grab onto smooth, hard-baked dirt where conventional knobs slide. The reinforced carcass construction utilizes high-tensile cords designed to resist casing deformation and puncture damage from sharp rocks and aggressive jump landings, ensuring that the tire maintains a stable, predictable contact patch under heavy lateral and vertical G-forces. ### Technical Specifications & Engineering Specs - **Tire Size**: 110/90-19 Rear (fits 2.15x19" motocross rims) - **Compound**: Michelin Silica Technology hard-pack wear-resistant matrix - **Tread Geometry**: Wide-block rectangular center tread with siped micro-edges - **Carcass**: High-tensile reinforced 3-ply carcass for extreme puncture resistance - **Target Terrain**: Hard clay, blue-groove, gravel, rocks, and baked summer dirt ### Step-by-Step Installation & Safety Protocols Installation is performed using heavy-duty tire spoons and generous bead lubricant. Disassemble the rear wheel, remove the old tire, and clean the rim and rim band. Lubricate the StarCross 6 Hard beads thoroughly (due to the stiff hard-pack carcass, adequate lubrication is essential for smooth mounting). Align the directional arrow on the sidewall, insert the tube or mousse, and lever the first bead over the rim flange. Work the second bead on slowly, taking small bites with your tire spoons to avoid tube pinches. Inflate to 32 PSI to seat the beads fully into the rim safety grooves, then drop the pressure to track-specific operating level (typically 13.0 to 14.5 PSI for hard-pack). Tighten the rim lock securely to 14-16 Nm. ### Maintenance & Track Setup Maintenance involves routinely monitoring cold tire pressures, as correct pressure is vital to preventing carcass bounce on hard surfaces. Inspect tread blocks for rounded leading edges and clean with water. ### Frequently Asked Questions **When should I choose the StarCross 6 Hard over the Medium Soft?** Choose the Hard compound when riding on hard-baked summer clay, rocky terrain, gravel, or tracks that form a shiny 'blue groove.' The harder rubber compound and wide block design resist tearing and provide superior surface grip on unyielding ground. **What is the recommended tire pressure for hard-pack motocross?** On hard-pack tracks, running slightly higher pressure (13.5 to 14.5 PSI) prevents the tire from rolling or squirming under extreme hard-braking and acceleration loads while protecting the rim from bottoming on hard edges. **Can this tire be used for off-road desert racing?** Yes, the StarCross 6 Hard is an outstanding choice for fast desert racing and stony fire roads due to its immense puncture resistance and slow tread wear rate on abrasive terrain. **Does the silica compound retain traction as the knobs wear down?** Yes. Unlike surface-coated tires, the silica is homogeneously blended throughout the entire tread block depth, delivering consistent grip all the way down to the base casing.

MSRP: $149.95 $119.96
Michelin StarCross 6 Medium Soft Front - Michelin aftermarket dirt bike part
20% OFF
Tires

Michelin StarCross 6 Medium Soft Front

The Michelin StarCross 6 Medium Soft Front Tire (size 80/100-21) represents the pinnacle of modern French off-road tire engineering, designed to replace conventional front tires with class-leading braking stability, progressive lean-angle traction, and unprecedented tread longevity. Developed alongside top FIM World Motocross Championship teams, the StarCross 6 is the first motocross tire to integrate Michelin's proprietary Silica Technology into the rubber compound matrix. The incorporation of silica within the synthetic polymer blend dramatically increases the tear resistance and mechanical bond of the tread blocks, delivering up to 16% more traction when new and maintaining up to 19% more grip as the tire wears compared to previous generation tires. The tread design features Michelin's Adaptive Design Technology, utilizing specific knob positioning and orientation to maximize braking bite when upright and smooth, progressive grip transition as the bike is leaned into deep ruts or flat sweepers. The casing architecture features a dual-ply polyester construction that delivers outstanding damping over braking bumps and square-edge chop, preventing front-end deflection. ### Technical Specifications & Engineering Specs - **Tire Size**: 80/100-21 Front (fits 1.60x21" front rims) - **Rubber Matrix**: Michelin Silica Technology high-density compound - **Tread Engineering**: Adaptive Design block positioning for dual-angle bite - **Carcass**: Dual-ply polyester high-compliance damping carcass - **Terrain Focus**: Soft, loam, sand, mixed dirt, and intermediate tracks ### Step-by-Step Installation & Safety Protocols Installation requires standard tire changing tools. Remove the front wheel and extract the valve core to deflate the tube. Unseat both tire beads, loosen the rim lock, and lever the old tire away. Clean the rim surface and rim strip. Lubricate the StarCross 6 beads with soapy water. Note the directional rotation arrow on the tire sidewall, insert the tube or mousse, and push the valve stem through the rim aperture. Work the lower bead onto the rim, followed by the upper bead, keeping the opposite side dropped into the deep center well of the wheel. Inflate until the bead seating line is uniform on both sides of the rim, set operating pressure (12.5 to 14.0 PSI), and secure the rim lock nut to 12-14 Nm. ### Maintenance & Care Maintenance includes checking tire pressure before riding and inspecting the silica tread blocks for even wear. Wash with standard motorcycle wash solutions; avoid harsh tire shine products that can make tread blocks slick. ### Frequently Asked Questions **What is Michelin Silica Technology and how does it help on the track?** Silica replaces conventional carbon black fillers in the rubber compound, providing exceptional mechanical grip on wet and dry dirt while significantly reducing knob chunking and prolonging the sharp edge life of the knobs. **Is the StarCross 6 Medium Soft suitable for intermediate tracks?** Yes. The Medium Soft is the most versatile tire in the StarCross 6 lineup, excelling in soft loam, deep sand, muddy conditions, and transitioning effortlessly onto intermediate hard-pack terrain. **Does the StarCross 6 front require a specific rim width?** The 80/100-21 size mounts directly onto standard 1.60-inch width 21-inch dirt bike front rims across all major Japanese and Austrian motocross and enduro motorcycles. **How does the front tire casing dampen braking bump chatter?** The high-density polyester casing plies are woven with tuned flex characteristics that absorb high-frequency vertical impacts, reducing handlebar vibration and keeping the tire pinned to the ground.

MSRP: $125.95 $100.76
Pro Circuit 304 Factory Sound Silencer - Pro Circuit aftermarket dirt bike part
20% OFF
Exhaust Systems

Pro Circuit 304 Factory Sound Silencer

The Pro Circuit 304 Factory Sound Silencer is the benchmark two-stroke performance silencer engineered to replace heavy, restrictive stock mufflers on modern two-stroke motocross and enduro machines. Featuring a slightly longer body section than shorty supercross silencers, the 304 Factory Sound strikes the ultimate balance between crisp throttle response, broadened mid-to-top power delivery, and an iconic, crisp two-stroke exhaust note that thrills riders without producing unbearable high-frequency ear fatigue. The canister body is extruded from lightweight, high-grade 6061-T6 aluminum with a brushed clear-anodized finish that resists corrosion and exhaust residue staining. The intake stinger tube and CNC-machined end cap are fabricated from durable stainless steel to resist exhaust vibration fatigue and heat cracking. Double-walled mounting brackets are welded directly to the canister for maximum structural rigidity under severe off-road vibration. On the track, the 304 silencer noticeably sharpens throttle response right off the bottom and allows the two-stroke powerband to pull cleanly through the midrange into extended top-end over-rev. ### Technical Specifications & Engineering Specs - **Canister Material**: Extruded 6061-T6 brushed aluminum - **Inlet Stinger & End Cap**: 304 stainless steel construction - **Core Design**: Perforated steel straight-through competition core - **Mounting**: Double-walled reinforced TIG-welded aluminum brackets - **Sound Profile**: Factory crisp two-stroke acoustic resonance ### Step-by-Step Installation & Safety Protocols Installation is exceptionally simple. Remove the right-side plastic number plate. Loosen the rubber joint coupler clamp connecting the pipe stinger to the silencer. Remove the two subframe mounting bolts and slide the stock silencer off. Inspect the rubber exhaust coupler and replace if torn or brittle. Apply a light dab of silicone grease to the inside of the rubber coupler, slide the Pro Circuit 304 inlet into the coupler, and line up the mounting brackets with the subframe tabs. Secure the mounting bolts to 18-20 Nm and tighten the hose clamp on the rubber sleeve. Ensure the silencer canister has adequate clearance from the rear brake caliper through the full suspension stroke. ### Maintenance & Repacking Schedule Maintenance requires repacking the silencer with two-stroke fiberglass packing cartridge every 20-30 operating hours, as two-stroke unburnt premix oil gradually saturates the packing material, degrading acoustic dampening and engine performance. ### Frequently Asked Questions **How does the 304 Factory Sound differ from the Pro Circuit R-304 Shorty?** The standard 304 Factory Sound has a longer aluminum body designed for all-around motocross and off-road power delivery with broad top-end over-rev, whereas the R-304 Shorty has a condensed canister tuned for explosive bottom-to-mid punch on tight supercross tracks. **Will the 304 silencer bolt onto my stock OEM two-stroke expansion chamber?** Yes. The Pro Circuit 304 silencer is engineered to bolt directly onto the factory OEM pipe as well as aftermarket Pro Circuit Works and Platinum expansion chambers. **How do I know when my two-stroke silencer needs repacking?** Key symptoms include a noticeably louder, harsher exhaust tone, oil weeping heavily from the end cap rivets, and a loss of crisp throttle response due to oil-saturated packing material restricting core flow. **Does this silencer include a spark arrestor?** No. The 304 Factory Sound is an open competition silencer; for a USFS-approved spark arrestor, consider the Pro Circuit Type 296 or Nature Friendly silencer models.

MSRP: $169.95 $135.96
Pro Circuit T-6 Stainless Steel Exhaust - Pro Circuit aftermarket dirt bike part
20% OFF
Exhaust Systems

Pro Circuit T-6 Stainless Steel Exhaust

The Pro Circuit T-6 Stainless Steel Exhaust System delivers the exact same championship-winning power curve, stepped header architecture, and race-tuned internal geometry as the flagship Ti-6 titanium line, but is constructed from rugged, cost-effective high-grade stainless steel. Engineered as an ideal solution for privateer racers, weekend motocross competitors, and aggressive off-road riders, the T-6 provides exceptional structural durability, roost impact resistance, and maximum horsepower gains without the premium price of full titanium. The T-6 system features a multi-stepped stainless steel header pipe, stainless steel mid-pipe, and a brushed aluminum silencer canister with a CNC-machined aluminum end cap. The stainless steel construction provides superior resistance to denting from heavy roost, rocks, and tip-overs compared to thin-wall titanium. Internally, the T-6 utilizes an asymmetrical core design that optimizes backpressure and scavenging velocity, resulting in crisp low-end pickup, a potent midrange surge, and broadened top-end over-rev. The system comes equipped with a removable USFS-approved spark arrestor, making it fully legal for transitions between closed-course motocross tracks and state-regulated forestry trails. ### Technical Specifications & Engineering Specs - **Header & Mid-Pipe Material**: High-grade 304 stainless steel tubing - **Canister Body**: Brushed 6061-T6 aluminum extrusion - **End Cap**: CNC-machined 6061-T6 billet aluminum - **Spark Arrestor**: Removable United States Forest Service (USFS) approved screen insert - **Brackets**: Heavy-duty TIG-welded reinforced mounting brackets ### Step-by-Step Installation & Safety Protocols Installation is straightforward using standard workshop metric sockets and wrenches. Remove the stock exhaust system, clean the cylinder head exhaust port, and install a fresh copper crush gasket. Mount the Pro Circuit stainless steel header, slide on the mid-pipe and silencer, and align the brackets with the subframe mounting holes. Torque cylinder head exhaust flange nuts to 14-16 Nm and subframe bolts to 20-24 Nm. Check that the exhaust clearance around the rear shock spring and plastic side panels exceeds 15mm. ### Maintenance & Care Maintenance involves repacking the aluminum canister with quality fiberglass exhaust packing every 25 to 35 operating hours to maintain sound compliance and protect the aluminum canister from internal heat damage. Wash with mild soap and water; stainless steel headers can be polished with Scotch-Brite to restore their bright metallic luster. ### Frequently Asked Questions **Does the T-6 produce the same horsepower as the titanium Ti-6?** Yes. The internal dimensions, pipe tapers, and resonance chamber designs of the T-6 and Ti-6 are identical, producing the same peak horsepower and torque curves. The difference is solely in construction materials (stainless steel/aluminum vs. full titanium). **Is the spark arrestor removable on the T-6 system?** Yes, the T-6 includes a removable United States Forest Service (USFS) approved screen-type spark arrestor that can be quickly removed for closed-course motocross or reinstalled for trail riding. **How does stainless steel compare to titanium for longevity?** Stainless steel is significantly more resistant to rock dents, fatigue cracks, and abrasive track wear than thin-wall titanium, making the T-6 an exceptionally durable choice for woods, enduro, and amateur racing. **Will the T-6 header turn blue like titanium?** Stainless steel headers turn a warm golden-bronze color under high exhaust heat rather than the vivid blue-purple hue of raw titanium.

MSRP: $899.95 $719.96
Pro Circuit Ti-6 Pro Full Titanium System - Pro Circuit aftermarket dirt bike part
20% OFF
Exhaust Systems

Pro Circuit Ti-6 Pro Full Titanium System

The Pro Circuit Ti-6 Pro Full Titanium Exhaust System is an uncompromising, championship-grade full racing exhaust designed to replace heavy OEM systems with a lightweight, maximum-power competition setup that meets AMA Supercross and Pro Motocross sound regulations. Developed directly in collaboration with the Monster Energy Pro Circuit Kawasaki factory racing team, the Ti-6 Pro is engineered for professional racers seeking every allowable horsepower advantage while strictly complying with the 112 dB AMA/FIM two-meter max sound test. The entire system—including the precision-stepped header pipe, expansion chamber resonator, mid-pipe, and silencer canister—is hand-welded from aerospace-spec titanium alloy with CNC-machined titanium mounting brackets. The silencer is capped with a lightweight carbon fiber end cap secured by high-tensile hardware. The stepped header design progressively expands exhaust flow diameter to optimize gas scavenging velocity across high-RPM operating zones. Riders experience immediate throttle response, explosive mid-range punch, and exceptional top-end over-rev that pulls smoothly all the way to the rev limiter without premature power drop-off. ### Technical Specifications & Engineering Specs - **System Construction**: 100% aerospace-grade titanium header, mid-pipe, and canister - **End Cap**: High-durability multi-layer carbon fiber composite - **Sound Compliance**: Engineered specifically to pass strict AMA/FIM 112 dB professional sound tests - **Header Design**: Stepped diameter tube architecture with RC-4 resonance chamber - **Mounting**: Precision TIG-welded CNC titanium mounting brackets ### Step-by-Step Installation & Safety Protocols Installation requires a methodical approach. Remove the factory side panels, silencer, and stock header pipe. Always install a new OEM copper exhaust port gasket in the cylinder head. Fit the Pro Circuit titanium header flange onto the cylinder head studs, keeping the nuts loose. Connect the mid-pipe and silencer assembly, utilizing the provided rubber-cushioned mounting brackets. Check clearances around the rear shock reservoir, swingarm, and water pump hoses. Once aligned perfectly, torque the cylinder head nuts to 14-16 Nm and the chassis mounting bolts to 20-22 Nm. Clean all titanium surfaces with rubbing alcohol before the initial startup to prevent finger oil stains from burning into the metal. ### Maintenance & Service Requirements Maintenance requires repacking the silencer core with Pro Circuit Pillow Packing every 15-25 race hours. Titanium components should be inspected after hard crashes to verify mounting bracket alignment and canister structural integrity. ### Frequently Asked Questions **What is the difference between the Pro Circuit Ti-6 Pro and standard Ti-6?** The Ti-6 Pro is engineered specifically to meet strict professional AMA and FIM sound regulations (112 dB max sound test) with an unremovable competition core, whereas the standard Ti-6 includes a removable USFS spark arrestor and is tailored for broader amateur closed-course and off-road applications. **Can I run the Ti-6 Pro header with a stock silencer?** No. The Ti-6 Pro is designed as a fully integrated, tuned system with specific mating pipe diameters and must be installed as a complete header, mid-pipe, and silencer assembly. **What weight savings does the Ti-6 Pro system provide?** Depending on the specific motorcycle model, the full titanium Ti-6 Pro system eliminates approximately 2 to 3.5 pounds of weight compared to stock OEM steel and aluminum exhaust assemblies. **Can I install a spark arrestor in the Ti-6 Pro?** No. The Ti-6 Pro features a fixed competition race core designed exclusively for closed-course competition without provisions for an internal spark arrestor screen.

MSRP: $1,199.95 $959.96
ProTaper Contour 1-1/8" Handlebars - ProTaper aftermarket dirt bike part
20% OFF
Handlebars & Controls

ProTaper Contour 1-1/8" Handlebars

The ProTaper Contour 1-1/8-inch Handlebar is the most popular oversize unbraced handlebar in motocross, engineered to deliver exceptional durability and controlled flex at an accessible price point. Replacing weak 7/8-inch stock bars that bend in tip-overs, the Contour features aerospace-spec 2000-series T6 aluminum alloy with an engineered 5mm wall thickness at the clamping area that tapers gracefully to 7/8 inches at the control ends. By eliminating the crossbar, the Contour allows the aluminum structure to flex naturally, isolating the rider's upper body from repetitive micro-shocks. The Contour's surface is treated with chemical profiling and hard-anodized shot peening, creating an exterior barrier that resists scratching, corrosion, and metal fatigue. When navigating rough tracks or rocky trails, the Contour provides a plush yet connected feel. It eliminates the harsh, jarring feedback typical of stiff OEM bars, helping riders maintain looser grip pressure and stave off premature forearm fatigue. The right-side control area is chemically polished to guarantee zero-friction throttle tube operation, while the left end features deep knurling to anchor the clutch grip. ### Technical Specifications & Engineering Specs - **Clamping Diameter**: 1-1/8" (28.6mm) oversize taper - **Control End Diameter**: Standard 7/8" (22.2mm) - **Material**: 2000-series aerospace T6 aluminum alloy - **Wall Thickness**: 5.0mm engineered wall design - **Included Hardware**: High-density molded foam bar pad with durable vinyl cover ### Step-by-Step Installation & Safety Protocols Installing the ProTaper Contour requires 1-1/8-inch bar mounts. Disassemble all handlebar-mounted hardware, noting the routing of the throttle cables, front brake hydraulic line, and wiring harnesses. Place the Contour into the lower bar clamps. Use the centering grid to dial in your preferred tilt angle, then torque the clamp bolts evenly in an alternating pattern to 20-24 Nm (15-18 ft-lbs). Mount the controls, ensuring adequate lever reach and ensuring that the front brake master cylinder sits level when the bike is upright. Verify that cables do not bind when the handlebars are turned lock-to-lock in both directions. ### Maintenance & Durability Lifespan Maintenance consists of routine post-wash inspections for signs of deep gouges or impact stress around the clamping areas. Clean with standard wash solutions and dry thoroughly. If the motorcycle sustains a severe impact that bends the bar, replace it immediately to maintain rider safety. ### Frequently Asked Questions **Is the high-density molded bar pad included with the Contour?** Yes, every ProTaper Contour handlebar comes complete with a high-density molded foam bar pad and a durable vinyl cover with Velcro closure. **Can I install the Contour on a bike with 7/8-inch bar mounts?** Yes, but you will need universal 7/8-inch to 1-1/8-inch bar mount adapters or replacement 1-1/8-inch triple clamp bar mounts to accommodate the larger clamping diameter. **How does 2000-series alloy differ from 7000-series alloy?** 2000-series alloy offers excellent impact absorption and cost-effective durability with slightly thicker walls (5mm vs 4mm), providing a very forgiving flex feel for recreational and competitive riders alike. **What is the best way to clean the throttle side before mounting the throttle tube?** Wipe the polished right side of the handlebar with contact cleaner and a clean rag to remove all grease or adhesive residue, ensuring zero drag on the throttle tube.

MSRP: $99.99 $79.99
ProTaper EVO 1-1/8" Handlebars - ProTaper aftermarket dirt bike part
20% OFF
Handlebars & Controls

ProTaper EVO 1-1/8" Handlebars

The ProTaper EVO 1-1/8-inch Handlebar is a benchmark unbraced oversize handlebar engineered to replace restrictive OEM bars with a purpose-built, high-compliance steering platform. ProTaper pioneered the tapered oversize bar concept, and the EVO series represents the highest evolution of their alloy engineering. Utilizing a proprietary computer-profiled 4mm wall design, the EVO combines aerospace-grade 7000-series aluminum with exceptional tensile and yield strength ratings. The absence of a rigid crossbar enables the bar to flex dynamically along its length, dissipating track harshness before it reaches the rider's hands. The manufacturing process involves chemical etching and a hard-anodized shot-peened finish that resists abrasive scratching from trail branches and roost. On the bike, the EVO delivers distinct mechanical advantages: steering response remains sharp and predictable during heavy rut entry, yet square-edge rocks, braking bumps, and harsh casing impacts are met with compliant deflection rather than punishing shock. Riders prone to chronic arm pump and hand numbness frequently transition to the ProTaper EVO due to its measured vibration-damping characteristics and forgiving flex arc. ### Technical Specifications & Engineering Specs - **Clamping Diameter**: 1-1/8" (28.6mm) oversize taper - **Control End Diameter**: Standard 7/8" (22.2mm) with chemically polished throttle side - **Material**: Proprietary 7000-series aerospace alloy - **Wall Thickness**: Precision-drawn 4.0mm computer-tapered profile - **Surface Treatment**: Hard-anodized, shot-peened finish with knurled clutch grip section ### Step-by-Step Installation & Safety Protocols Installation begins with preparing 1-1/8-inch (28.6mm) bar clamps. Remove the throttle housing, grips, switchgear, brake master cylinder, and clutch perch. Ensure the clamping surfaces on the triple clamps are clean and free of metallic debris. Set the ProTaper EVO into the saddles and reference the precision laser-etched alignment marks to adjust handlebar roll forward or backward according to rider ergonomics. Tighten the clamp bolts evenly in a criss-cross sequence to manufacturer torque specs (typically 22-25 Nm). Install the left-side grip using grip glue and safety wire, taking advantage of the knurled left grip area which prevents grip slippage under wet conditions. Ensure the smooth right side permits effortless throttle tube rotation. ### Maintenance & Inspection Guidelines Routine maintenance involves checking clamp bolt torque periodically and inspecting the bar's taper transitions after crashes. Never attempt to straighten a bent aluminum handlebar with heat or mechanical leverage, as this permanently compromises the crystalline molecular structure of the 7000-series alloy. ### Frequently Asked Questions **How does the ProTaper EVO compare to the ProTaper Contour?** The EVO is ProTaper's flagship premium bar, utilizing higher-spec 7000-series aerospace alloy and a refined 4mm wall profile that offers up to 25% more flex and fatigue resistance compared to the Contour, making it the choice for demanding racers. **Does the EVO come with a handlebar pad?** No, because the EVO is an unbraced oversize bar, an oversized molded bar pad is sold separately or included in specific promotional bundles. **What does the left-side knurling do?** The precision knurling provides mechanical bite for the clutch-side grip, ensuring that grip adhesive bonds securely to prevent grip throttle-twisting during muddy or rainy riding conditions. **Can I run handguards with the ProTaper EVO?** Yes, the internal bore of the EVO handlebar accepts standard 14mm aluminum bar-end insert plugs for wraparound handguards, or clamp-on flag-style handguards on the 7/8" control zone.

MSRP: $115.99 $92.79
ProTaper Micro Handlebar Kit - ProTaper aftermarket dirt bike part
20% OFF
Handlebars & Controls

ProTaper Micro Handlebar Kit

The ProTaper Micro Handlebar Kit is an innovative, purpose-designed handlebar and control system engineered specifically for youth riders and mini motocross machines ranging from 50cc to 85cc. Stock mini-bike handlebars utilize adult-sized 7/8-inch grip diameters that force young riders with smaller hands to over-grip, leading to rapid hand fatigue, diminished throttle modulation, and compromised machine control. The Micro Handlebar Kit solves this by utilizing an advanced tapered design where the grip and throttle control zones are reduced to a smaller diameter, matching the natural ergonomics of youth hands. Constructed from ProTaper's exclusive 2000-series T6 aluminum alloy, the Micro bar maintains standard 7/8-inch (22.2mm) diameter at the central triple-clamp mounting area, allowing it to drop directly into standard mini-bike bar clamps without expensive adapters. The bar then transitions to a reduced diameter at the grip sections. The kit includes a custom two-piece multi-cam throttle tube with interchangeable throttle reels to match various 2-stroke and 4-stroke mini bike cable configurations, as well as ultra-soft micro-diameter half-waffle grips. On the track, young racers gain immediate confidence through a more secure grasp, enhanced brake and clutch lever reach, and smoother throttle execution over jumps and through corners. ### Technical Specifications & Engineering Specs - **Clamping Diameter**: Standard 7/8" (22.2mm) fits all OEM mini-bike triple clamps - **Grip & Control Area Diameter**: Reduced youth-specific micro-diameter - **Material**: Cold-drawn 2000-series T6 aluminum alloy - **Included in Kit**: Micro handlebar, crossbar pad, 2-piece multi-cam throttle tube, and Micro 1/3-waffle grips - **Throttle Compatibility**: Interchangeable cams for KTM, Yamaha, Kawasaki, Honda, and Suzuki mini bikes ### Step-by-Step Installation & Safety Protocols Installation involves removing the stock mini handlebar, throttle assembly, and grips. Install the Micro handlebar into the OEM 7/8-inch clamps, aligning the central positioning marks, and torque the clamp bolts evenly to 15-18 Nm. Select the appropriate throttle cam reel included in the kit that matches your bike's throttle cable barrel. Assemble the throttle tube onto the bar with a light application of dry PTFE lubricant (never use heavy grease which attracts dirt), ensuring free return when released. Install the supplied micro-diameter grips using quality grip glue, and mount all levers and kill switches. ### Maintenance & Inspection Routine Maintenance requires inspecting the throttle tube for smooth rotation before every moto, cleaning dirt out of the throttle housing, and checking grip wear. Periodically verify clamp torque. Replace the handlebar immediately if bent during a crash. ### Frequently Asked Questions **Will the ProTaper Micro Bar fit my child's mini bike without special clamps?** Yes. The central clamping area is standard 7/8-inch (22.2mm), so it fits standard OEM mini-bike triple clamps on bikes like the KTM 50/65/85 SX, Yamaha YZ65/85, Kawasaki KX65/85, and Honda CRF110F. **Can I use standard replacement grips on the Micro Bar?** No. The grip ends have a reduced diameter, so you must use ProTaper Micro replacement grips specifically designed for this system. **How do the included throttle cams work?** The kit includes multiple snap-on nylon throttle cams engineered to replicate the cable pull ratio of major youth motorcycle models, ensuring correct throttle throw from idle to wide open. **Does the kit include a crossbar pad?** Yes, a high-density molded ProTaper mini foam crossbar pad with a protective vinyl cover is included in every kit.

MSRP: $139.99 $111.99
ProTaper PT520 Pro Series Chain - ProTaper aftermarket dirt bike part
20% OFF
Drive Chains

ProTaper PT520 Pro Series Chain

The ProTaper PT520 Pro Series Chain is a high-performance, non-sealed competition racing chain engineered to replace stock drive chains with a high-strength, low-friction driveline link. Designed specifically for modern motocross, supercross, and arena racing, the PT520 is constructed to withstand the brutal instantaneous torque spikes of modern fuel-injected four-strokes while minimizing frictional drag and rotational inertia. Manufactured in Japan to rigid aerospace tolerances, the PT520 utilizes premium high-carbon alloy steel link plates that are shot-peened and heat-treated to resist stretching and fatigue failure under extreme competition loads. The chain features solid bushings and solid rollers that resist impact deformation from rocks and hard jump landings. With an outstanding tensile strength rating exceeding 8,400 lbs, the PT520 provides reliable power delivery without stretching out after every moto. The gold-plated side plates provide a durable barrier against rust and chemical corrosion while elevating the bike's aesthetic appeal. ### Technical Specifications & Engineering Specs - **Chain Pitch**: 520 Pitch (Standard 5/8" x 1/4" dimensions) - **Construction**: Premium non-sealed Japanese competition racing chain - **Tensile Strength**: 8,400+ lbs rating for maximum shock load resistance - **Bushing / Roller Type**: Cold-formed solid bushings and solid seamless rollers - **Plating**: Gold-plated outer link plates with natural shot-peened inner links - **Link Count Options**: Standard 120 links (trimmable to exact wheelbase specification) ### Step-by-Step Installation & Safety Protocols Installation is straightforward using standard 520 chain tools. Cut the chain to the correct link count for your gearing setup. Thread the chain through the driveline components, wrap the ends around the rear sprocket, and insert the supplied clip-type master link. Press the outer side plate into position and clip the spring retainer into place with the closed loop facing forward in the direction of chain rotation. Set rear axle block alignment marks evenly on both sides of the swingarm to ensure perfect sprocket alignment, set chain slack to 50-55mm, and torque the axle nut to manufacturer specs. ### Maintenance & Care Routine Maintenance consists of routine post-wash cleaning with a non-acidic chain cleaner, blow-drying thoroughly, and applying a high-grade synthetic chain lube before every moto to prevent friction and heat buildup. ### Frequently Asked Questions **Is the ProTaper PT520 chain pre-stretched at the factory?** Yes. ProTaper pre-stresses and pre-stretches the PT520 chain during the manufacturing process, which drastically reduces initial chain stretch and minimizes the need for constant adjustment during the first few rides. **Does this chain include a master link?** Yes, every ProTaper PT520 Pro Series Chain comes packaged with a matching gold clip-type master link. **What is the advantage of solid rollers over split rollers?** Solid rollers are seamless cylinders cold-formed from high-tensile steel, preventing roller cracking, flattening, and catastrophic failure under heavy shock loads compared to cheaper split-rolled rollers. **Can the PT520 chain handle modern 450cc four-stroke torque?** Yes, the 8,400 lb tensile strength rating is specifically calibrated to handle the aggressive torque pulses of 450cc four-stroke competition engines. **How do I adjust chain slack correctly?** Place the motorcycle on a center stand so the rear wheel hangs freely, find the tightest spot in the chain by rotating the wheel, and measure slack at the middle of the swingarm slider.

MSRP: $109.99 $87.99
ProTaper Pillow Top Lite Grips - ProTaper aftermarket dirt bike part
20% OFF
Handlebars & Controls

ProTaper Pillow Top Lite Grips

The ProTaper Pillow Top Lite Grips are an industry-favorite vibration-damping grip designed for riders seeking maximum palm cushioning and fatigue reduction in a slim, low-profile format. While the standard Pillow Top is renowned for its thick, plush comfort, the Pillow Top Lite reduces the outer diameter slightly to accommodate riders who prefer a more direct, connected feel on the handlebar and throttle tube without sacrificing impact absorption. Constructed from a proprietary dual-compound Kraton thermoplastic rubber, the grip features a firm inner core that forms a rigid bond with the handlebar and throttle tube, preventing internal twisting, and a soft, tacky outer matrix molded into raised rectangular 'pillows.' These independent traction blocks compress elastically under hand pressure, absorbing high-frequency engine vibration and harsh chatter from rocky trails and braking bumps. The deep channels between the pillows actively evacuate mud, sand, and water away from the contact patch, maintaining dependable grip in terrible weather conditions. ### Technical Specifications & Engineering Specs - **Material**: Dual-density Kraton thermoplastic synthetic rubber - **Surface Texture**: Low-profile vibrating-damping pillow matrix with self-cleaning mud channels - **Dimensions**: Reduced outer diameter compared to traditional Pillow Top for slim grip ergonomics - **Compatibility**: Standard 7/8" (22.2mm) clutch side and 1" (25.4mm) throttle tube side - **Securing Features**: Recessed safety wire channels molded directly into the inner and outer flanges ### Step-by-Step Installation & Safety Protocols Installation begins by stripping old grips and cleaning the handlebar and throttle tube surfaces with contact cleaner. Apply a generous layer of quality grip glue to the bar end and inner grip bore. Slide the Pillow Top Lite grip into place smoothly, orienting the flange and logo to your preferred visual angle. Ensure the grip does not interfere with the throttle housing rotation. Secure the grip with safety wire placed in the designated recessed wire grooves at the inner flange, center, and outer edge. Allow the glue to cure fully (typically 8-12 hours) before riding. ### Maintenance & Service Care Maintenance is simple: wash with mild soap and water during regular bike washes. Inspect the grip ends for tearing in the event of tip-overs. Do not spray chain lube or harsh solvent degreasers directly onto the Kraton rubber material, as petroleum distillates can soften and degrade the compound. ### Frequently Asked Questions **What is the difference between ProTaper Pillow Top and Pillow Top Lite?** The Pillow Top Lite features a slightly slimmer overall outer diameter compared to the standard Pillow Top, offering a less bulky grip feel suited for riders with smaller hands or those who prefer closer finger contact around the bar. **How does the dual-compound design work?** The firm inner core creates a secure, non-slip interface with the bar, while the ultra-soft outer pillow surface cushions the hand and dampens vibration, delivering the optimal blend of durability and comfort. **Will these grips work with twist throttles on all motocross bikes?** Yes. Each pair includes one 7/8-inch (22.2mm) inner diameter grip for the clutch side and one 1-inch (25.4mm) inner diameter grip designed to slide over standard dirt bike throttle tubes. **Do the mud relief channels really help in wet races?** Yes. The open spaces between the raised pillows allow wet clay and slime to channel away under hand pressure, maintaining direct palm contact with the tacky pillow blocks.

MSRP: $19.99 $15.99
ProTaper Race Spec Aluminum Sprocket - ProTaper aftermarket dirt bike part
20% OFF
Drive Chains

ProTaper Race Spec Aluminum Sprocket

The ProTaper Race Spec (RS) Aluminum Rear Sprocket is an ultralight, high-precision rear sprocket engineered to deliver minimum rotating mass, razor-sharp throttle response, and race-winning durability for competitive motocross and off-road motorcycles. Reducing unsprung rotating mass at the rear wheel provides an immediate mechanical advantage: the rear suspension reacts faster over high-speed chop, and engine power spools up with crisp urgency out of corners. CNC-machined in the USA from premium 7075-T6 aerospace-grade aluminum alloy, the RS sprocket features an optimized CAD-engineered cutout pattern that achieves maximum structural rigidity while shedding every unnecessary gram of weight. The sprocket teeth undergo a specialized deep-tooth profile machining process that ensures seamless chain engagement and minimizes friction. Angled mud-relief grooves are machined into the base of every tooth valley on both sides of the sprocket, using centrifugal force to actively eject wet clay, sand, and mud away from the chain contact path. The sprocket is finished with a hard-anodized coating that resists abrasive wear and corrosion. ### Technical Specifications & Engineering Specs - **Material**: 100% CNC-machined 7075-T6 aerospace aluminum alloy - **Tooth Profile**: Deep-tooth CAD radius for optimal chain roller contact - **Mud Channels**: Angled bilateral mud-relief grooves on both inner and outer faces - **Finish**: Anodized protective coating with laser-etched tooth count - **Weight**: Approx. 280-320 grams (depending on tooth count) ### Step-by-Step Installation & Safety Protocols Installation requires high-strength metric sprocket bolts and Fuji metal-locking nuts. Clean the hub face thoroughly. Place the ProTaper RS sprocket against the wheel hub with the engraved tooth count facing outward. Insert new tapered sprocket bolts with a dab of blue Loctite on the threads. Tighten the locking nuts in a progressive diagonal sequence to the motorcycle manufacturer's specified torque (typically 32 to 35 Nm). Always verify that the sprocket sits completely flat against the hub shoulder without gaps. ### Maintenance & Wear Indicators Maintenance includes inspecting the aluminum teeth for hooking, shark-finning, or lateral bending. When teeth exhibit visible directional wear or when replacing your drive chain, replace the sprocket immediately to prevent chain damage. ### Frequently Asked Questions **Why are mud grooves important on an aluminum rear sprocket?** Mud grooves provide an escape channel for packed dirt, clay, and sand. Without mud grooves, debris packs tightly into the tooth valleys, overtightening the chain and causing extreme premature wear on both the chain and sprockets. **What is the benefit of 7075-T6 aluminum over standard aluminum?** 7075-T6 is an aerospace-grade alloy with exceptional yield strength and hardness (comparable to many structural steels) while weighing approximately one-third as much, making it the premier material for lightweight racing sprockets. **How do I tell when my ProTaper aluminum sprocket needs replacement?** Replace the sprocket when the teeth lose their symmetrical trapezoidal shape and begin to curve forward like shark fins, or when the tips of the teeth become visibly sharpened or chipped. **Can I run an O-ring chain with this aluminum sprocket?** Yes. The ProTaper RS sprocket is fully compatible with both non-sealed (non O-ring) and sealed (O-ring / X-ring) 520 drive chains.

MSRP: $69.95 $55.96
Renthal Fatbar 1-1/8" Handlebars - Renthal aftermarket dirt bike part
20% OFF
Handlebars & Controls

Renthal Fatbar 1-1/8" Handlebars

The Renthal Fatbar 1-1/8-inch Handlebar is an unbraced, profile-tapered motocross and enduro handlebar engineered to replace rigid crossbar assemblies and fragile 7/8-inch standard bars. Designed without a welded or clamped crossbar, the Fatbar relies on a computer-profiled wall thickness that tapers from 1-1/8 inches (28.6mm) at the central clamping area down to 7/8 inches (22.2mm) at the control ends. This tapered geometry allows the handlebar to flex elastically under vertical shock loads while maintaining torsional stiffness across steering inputs. Manufactured from exclusive 7010-T6 aerospace aluminum alloy, the Fatbar undergoes shot-peening surface treatment to dramatically increase fatigue life and resist surface notch sensitivity caused by gravel and debris impact. The bar is finished with a 15-step hard anodizing process that protects against corrosion and minimizes clamp wear. On the track or trail, riders experience a significant reduction in forearm fatigue and palm bruising on high-speed braking bumps, chop, and jump over-shoots. The natural flex profile absorbs chatter that would otherwise transmit directly into the rider's wrists and shoulders, allowing longer motos and improved line accuracy through rough chop. ### Technical Specifications & Engineering Specs - **Clamping Diameter**: 1-1/8" (28.6mm) unbraced taper design - **Control End Diameter**: Standard 7/8" (22.2mm) - **Material**: Proprietary 7010-T6 aerospace-grade aluminum alloy - **Wall Thickness**: Computer-tapered 5.0mm base to 4.0mm tip profile - **Included Accessories**: High-density molded Renthal foam bar pad ### Step-by-Step Installation & Safety Protocols Fitting a Renthal Fatbar requires 1-1/8-inch bar clamps. Before installation, remove the existing hand grips, throttle housing, front brake master cylinder, and clutch perch assembly. Clean the lower clamp surfaces thoroughly of any grit or burrs. Center the Fatbar within the lower clamps, utilizing the laser-etched alignment grid to set the bar sweep to your preferred riding stance. Reinstall the upper clamp caps and tighten the pinch bolts progressively, ensuring an even gap between the front and rear of the clamps unless your bike manufacturer specifies a zero-gap front clamp design. Tighten to OEM torque specifications (generally 20 to 26 Nm). Reinstall controls, making sure not to over-tighten perch bolts (recommended 5-8 Nm) so they can rotate upon impact rather than snapping. ### Maintenance & Inspection Protocol Maintenance for the Fatbar includes inspecting the bar for bending, scratches deeper than surface anodizing, or pinch damage from over-torqued clamps after any major spill. Clean using mild detergent and water; avoid aggressive acid-based aluminum cleaners. Replace immediately if the bar sustains visible deformation. ### Frequently Asked Questions **Why choose an unbraced Fatbar over a crossbraced handlebar?** Unbraced tapered bars offer greater vertical flex and compliance than crossbraced bars, resulting in reduced rider fatigue over long motos and rocky off-road terrain, while still delivering superior strength compared to standard 7/8-inch bars. **Will my stock controls, throttle tube, and grips fit the Renthal Fatbar?** Yes. The Fatbar tapers down to standard 7/8-inch (22.2mm) diameter at both ends, allowing all OEM throttle assemblies, switchgear, hand controls, and standard 7/8-inch grips to bolt on without modification. **What torque should I use on the handlebar clamp bolts?** Always refer to your motorcycle's factory service manual, but typical torque values for 1-1/8-inch bar clamps range from 20 to 25 Nm (15 to 18 ft-lbs). Tighten bolts evenly in an alternating X-pattern to maintain uniform clamping pressure. **How does shot-peening improve handlebar longevity?** Shot-peening bombards the alloy surface with microscopic spherical media, creating beneficial residual compressive surface stress that prevents surface micro-fissures from propagating into structural fatigue cracks.

MSRP: $119.95 $95.96
Renthal Kevlar Half-Waffle Grips - Renthal aftermarket dirt bike part
20% OFF
Handlebars & Controls

Renthal Kevlar Half-Waffle Grips

The Renthal Kevlar Half-Waffle Grips represent the pinnacle of motocross grip technology, blending the ultra-soft feel of a competition grip with the extreme longevity of composite engineering. Standard grips force riders into an unpleasant compromise: soft rubber compounds offer superb traction and vibration damping but wear out in a handful of motos, while hard compounds last all season but cause severe palm blistering and arm pump. Renthal solved this dilemma by infusing millions of microscopic DuPont Kevlar aramid resin particles into their proprietary thermoplastic elastomer matrix. As the grip is used, the outer elastomer matrix gently wears, continuously exposing more Kevlar particles at the contact surface. The result is a grip that feels luxuriously soft and tacky in dry, wet, or muddy conditions while outlasting standard soft-compound grips by up to three times. The classic Half-Waffle pattern combines a smooth, diamond-knurled upper half that maximizes palm surface contact with a traditional waffle grid on the lower half that gives fingertips positive mechanical purchase when pulling against acceleration forces. ### Technical Specifications & Engineering Specs - **Material Composition**: Thermoplastic elastomer infused with microscopic DuPont Kevlar aramid particles - **Pattern**: Dual-surface Half-Waffle (Diamond knurl upper / Waffle grid lower) - **Hardness / Durometer**: Ultra-soft base feel with progressive Kevlar particle wear resistance - **Diameter Compatibility**: Fits all standard 7/8" (22.2mm) handlebars and 1" (25.4mm) throttle tubes - **Safety Features**: Integrated safety wire grooves at inner flange, center, and outer edge ### Step-by-Step Installation & Safety Protocols Installation requires thorough preparation. Carefully cut away the old grips using a razor blade, taking care not to gouge the plastic throttle tube or aluminum handlebar. Clean both surfaces with isopropyl alcohol or brake cleaner until completely free of old adhesive residue. Apply a continuous coat of Renthal Grip Glue to both the inside of the grip and the handlebar surface. Slide the grip on in one smooth, continuous motion, aligning the waffle section to the underside where your fingers curl. Ensure the grip flange is seated flush against the inner housing. Allow the adhesive to cure for at least 8 hours, then install stainless steel safety wire around the dedicated grip wire grooves (two to three wraps per groove, twisting and burying the wire pigtails into the rubber) to prevent slippage in wet conditions. ### Maintenance & Grip Longevity Maintenance involves washing grips with regular soap and water after riding. Avoid soaking grips in petroleum solvents, degreasers, or chain lube, which degrade thermoplastic compounds. ### Frequently Asked Questions **Why do Renthal Kevlar grips have a unique natural beige color?** The distinctive light tan/beige color is the natural hue of raw DuPont Kevlar aramid fibers embedded within the transparent elastomer base without artificial color dyes. **Do I have to use safety wire with these grips?** While Renthal Grip Glue provides a powerful chemical bond, safety wiring grips in the designated recessed grooves is highly recommended for all motocross and off-road riding to ensure grips never rotate under wet or muddy conditions. **How do Kevlar grips help reduce arm pump?** Because the compound is exceptionally soft and tacky, riders can maintain total control with lighter grip pressure, dramatically reducing muscular forearm tension and mitigating arm pump. **How many hours of riding do Renthal Kevlar grips typically last?** Under normal motocross conditions, riders typically achieve 30 to 50 operating hours before significant waffle wear occurs, roughly triple the lifespan of standard soft-compound grips.

MSRP: $24.95 $19.96
Renthal R1 Works Chain 520 - Renthal aftermarket dirt bike part
20% OFF
Drive Chains

Renthal R1 Works Chain 520

The Renthal R1 Works 520 Chain is a premium, high-strength non O-ring motocross chain engineered to deliver maximum power transfer, exceptional tensile integrity, and minimal rotating weight for competitive closed-course racing. Designed to replace standard OEM chains that stretch rapidly during initial motos, the R1 Works chain combines shot-peened alloy steel link plates with high-precision components to withstand the violent shock loads produced by modern high-horsepower four-stroke and two-stroke racing engines. The R1 Works chain features chamfered inner link plates that reduce the chance of chain derailment under heavy swingarm flex and improve chain guide tracking over rough braking bumps. The alloy steel pins are heat-treated with an advanced induction hardening process, creating a wear-resistant outer surface that resists elongation while absorbing hard landing impacts without snapping. The gold-anodized side plates deliver outstanding corrosion resistance while giving your race machine a clean factory works look. Rated at an impressive 7,644 lbs tensile strength, the R1 provides unbeatable lightweight driveline performance. ### Technical Specifications & Engineering Specs - **Chain Pitch**: 520 Pitch (Standard 5/8" pitch x 1/4" roller width) - **Construction**: Non O-ring competition lightweight race chain - **Tensile Strength**: 7,644 lbs (34.0 kN) - **Pin Engineering**: Induction-hardened alloy steel with shot-peened link plates - **Link Chamfering**: Precision chamfered inner link plates for smooth guide engagement ### Step-by-Step Installation & Safety Protocols Installation requires a chain cutter tool, pliers, and a master link press tool. Route the chain through the front countershaft sprocket, swingarm rub guard, and rear chain guide. Align the chain ends on the rear sprocket teeth. Lubricate the master link pins with quality grease, slide the master link through from the wheel side, install the outer side plate, and secure with the spring clip. Verify that the closed end of the spring clip points in the direction of forward chain rotation. Adjust chain tension using the axle blocks so that you have approximately 3 fingers (50-55mm) of chain slack at the center of the swingarm. Torque the rear axle nut to factory specification (typically 100-110 Nm). ### Maintenance & Sprocket Pairing Maintenance includes cleaning the chain with a nylon brush after every track day, drying with compressed air, and lubricating with Renthal Chain Lube. Replace the chain alongside new sprockets to maximize driveline longevity. ### Frequently Asked Questions **Can I use the Renthal R1 chain for trail or desert riding?** While the R1 is exceptionally strong, it is a non-sealed competition chain intended for closed-course motocross. For long-distance desert or mud/trail enduro riding where chains cannot be cleaned frequently, a sealed chain like an X-ring or O-ring is recommended. **Why is it important to replace sprockets when installing a new chain?** Installing a new chain onto worn sprockets (which have hooked or shark-finned teeth) causes the new chain to mesh improperly, accelerating chain wear and wearing out the new chain in just a few rides. **What master link is supplied with the Renthal R1 Works chain?** The R1 Works chain includes a standard clip-type master link with gold side plates for easy installation and maintenance. **How do I measure chain stretch on the Renthal R1?** Measure the distance across 20 chain pins with a vernier caliper under tension; if the measurement exceeds the service limit on the Renthal spec sheet, replace the chain.

MSRP: $89.95 $71.96
Renthal Twinring Rear Sprocket - Renthal aftermarket dirt bike part
20% OFF
Drive Chains

Renthal Twinring Rear Sprocket

The Renthal Twinring Rear Sprocket is a revolutionary hybrid rear sprocket engineered to solve the age-old motocross dilemma: the featherweight agility of aluminum versus the multi-season longevity of heavy steel. Standard 7075 aluminum sprockets wear out quickly in mud and sand, while solid steel sprockets add significant unsprung, rotating weight that slows down suspension response and throttle acceleration. The Renthal Twinring combines the best of both worlds through a patented bi-metal construction. The outer tooth ring is manufactured from case-hardened, high-strength nickel-coated steel, providing extreme wear resistance that outlasts standard aluminum sprockets by up to three times in brutal abrasive conditions. The inner carrier is CNC-machined from ultralight aerospace-grade 7075-T6 aluminum, keeping rotating unsprung mass to an absolute minimum. The steel outer ring is heat-expanded and shrunk onto the aluminum inner carrier, then locked permanently into place with high-tensile flat-head rivets. Mud-clearing grooves are precision-machined into the tooth roots to prevent chain packing in deep mud. ### Technical Specifications & Engineering Specs - **Outer Ring**: Case-hardened nickel-coated carbon steel tooth ring - **Inner Carrier**: CNC-machined 7075-T6 aerospace-grade aluminum core - **Assembly Method**: Thermal shrink-fit joined with high-tensile mechanical rivets - **Mud Evacuation**: Machined self-cleaning mud grooves at tooth roots - **Wear Longevity**: Up to 300% longer operational life compared to 7075 aluminum ### Step-by-Step Installation & Safety Protocols Installation requires a set of new tapered sprocket bolts and locking nuts (never reuse old sprocket hardware). Clean the rear wheel hub mounting surface of all dirt and burrs. Position the Renthal Twinring against the hub flange, align the mounting holes, and insert new high-tensile sprocket bolts coated with medium-strength thread locker. Tighten the nuts in an alternating criss-cross star pattern, torquing evenly to factory specification (typically 32 to 36 Nm). Ensure the sprocket spins true with zero lateral wobble before installing the wheel into the swingarm. ### Maintenance & Service Inspection Maintenance is remarkably low: inspect tooth profiles during regular bike washes. The case-hardened steel teeth will retain their symmetrical profile for dozens of hard riding hours before displaying slight tooth hook wear. ### Frequently Asked Questions **How much longer does a Twinring sprocket last compared to an all-aluminum sprocket?** Due to the case-hardened steel outer tooth ring, the Renthal Twinring typically lasts up to three times longer than standard 7075 aluminum sprockets, making it the premier choice for sand, mud, and cross-country racing. **Is the Renthal Twinring significantly heavier than an aluminum sprocket?** While slightly heavier than a 100% aluminum sprocket, the Twinring is substantially lighter than a traditional solid steel sprocket because the large central carrier is CNC-machined from lightweight 7075-T6 aluminum. **Should I use new sprocket bolts when installing the Twinring?** Yes. Always install new high-grade sprocket bolts with locking nuts and thread locker, as reusing old stretched bolts can lead to loose hardware that damages your rear wheel hub. **What pitch chain is compatible with the Renthal Twinring?** The Twinring is precision-machined for standard 520 pitch motocross and off-road drive chains.

MSRP: $119.95 $95.96
Renthal Twinwall 997 Handlebars - Renthal aftermarket dirt bike part
20% OFF
Handlebars & Controls

Renthal Twinwall 997 Handlebars

The Renthal Twinwall 997 Handlebar is a premier engineered motocross handlebar designed to replace standard OEM 7/8-inch or flexible 1-1/8-inch bars that are prone to bending or transmitting excessive harshness during hard landings and square-edge impacts. Utilizing a patented tube-within-a-tube architecture, the Twinwall borrows principles from aircraft design to achieve maximum strength and controlled flex. The outer tube is extruded from 7304-T6 aluminum alloy, offering extreme resistance to mechanical damage, roost abrasion, and bending stresses, while being hard anodized to prevent corrosion. The inner tube is manufactured from ultra-high-strength 7010-T6 aerospace aluminum and hard anodized to resist wear from the throttle tube and control clamps. Riders immediately notice the distinct balance between structural rigidity and impact absorption. While single-wall bars can feel either excessively rigid (leading to arm pump) or overly flexible (causing a vague front-end steering sensation), the Twinwall 997 bend—measuring 804mm in width, 105mm in height, and 54mm in sweep—delivers precise front-wheel feedback when carving into ruts while the engineered internal nylon sleeve allows slight deflection under heavy impacts to dissipate shock. Rubber seals protect the junction between the inner and outer tubes to prevent water and dirt ingress, ensuring consistent flex characteristics over seasons of competition. ### Technical Specifications & Engineering Specs - **Clamping Diameter**: 1-1/8" (28.6mm) oversize taper - **Control End Diameter**: Standard 7/8" (22.2mm) - **Dimensions**: Width 804mm | Height 105mm | Rise 64mm | Clamp Area Width 110mm | Sweep 54mm - **Material Construction**: Dual-tube alloy (Outer: 7304-T6 / Inner: 7010-T6 aerospace aluminum) - **Surface Finish**: Shot-peened, anodized with laser-etched positioning grid ### Step-by-Step Installation & Safety Protocols Installation requires a standard 1-1/8-inch (28.6mm) handlebar clamp. If upgrading from OEM 7/8-inch (22.2mm) bars, aftermarket oversize bar mounts or triple clamps with 28.6mm clamping diameter must be installed. Begin by loosening and removing the front brake master cylinder, clutch perch, kill switch, and throttle assembly. Remove the four upper clamp bolts and lift the stock bar away. Position the Renthal Twinwall in the lower clamps, using the laser-etched positioning grid on the bar center to align your preferred rake angle. Tighten the clamp bolts in a cross-pattern to the motorcycle manufacturer's specified torque (typically 20-25 Nm / 15-18 ft-lbs). Reinstall control perches with appropriate gap spacing, ensuring the throttle tube rotates freely with snap-back return without binding against the bar end. ### Maintenance & Service Lifespan Maintenance involves regular visual inspection after every ride or crash. Check the crossbar clamps and ensure the crossbar pad is securely fastened. Inspect the clamp interface for scoring or hairline stress fractures. Handlebars subjected to severe high-speed crashes where bending occurs should be retired immediately, as aluminum fatigues rapidly once deformed. ### Frequently Asked Questions **What is the benefit of the 997 bend over other Renthal bends?** The 997 bend (often referred to as the Stewart/Villopoto bend) features a modern, neutral ergonomics profile with 804mm width, 105mm height, and 54mm sweep. It accommodates riders from 5'8" to 6'1" looking for a balanced attack position across motocross and supercross tracks without forcing wrists into an awkward angle. **Do I need special bar mounts to install Renthal Twinwalls?** Yes, if your motorcycle comes stock with 7/8-inch handlebars, you must install 1-1/8-inch bar mount adapters or replacement triple clamps. If your bike already features 1-1/8-inch oversize clamps (standard on modern 450s), the Twinwall drops directly in. **How does the nylon sleeve between the tubes work?** The engineered nylon sleeve sits between the inner 7010-T6 tube and outer 7304-T6 tube. It acts as an elastomeric buffer that dampens high-frequency engine and chassis vibration while allowing controlled micro-movement during extreme impact loads. **Can I cut down the width of the Renthal Twinwall?** Yes, the control ends can be trimmed by 5mm to 10mm using a dedicated metal tubing cutter or fine-tooth hacksaw if you ride narrow woods or technical enduro trails, ensuring deburring of the cut edges before grip installation.

MSRP: $149.95 $119.96
Suzuki RM-Z Works Showa Fork Kit - Suzuki aftermarket dirt bike part
20% OFF
Suspension

Suzuki RM-Z Works Showa Fork Kit

The Suzuki RM-Z Works Showa Fork & Suspension Upgrade Kit is an elite suspension performance package engineered to transform the handling, plushness, and bottoming resistance of the Suzuki RM-Z250 and RM-Z450. The Suzuki RM-Z chassis is universally celebrated for having the sharpest turning geometry in motocross, but stock fork valving can feel harsh on high-speed square-edge bumps and prone to mid-stroke deflection. This Works Showa upgrade kit resolves this by replacing restrictive internal valving with genuine Works-spec hydraulic components. The kit features precision CNC-machined Works Showa compression and rebound base valves, DLC-coated low-friction damper rods, high-flow piston assemblies, and custom-tuned progressive spring perches. The advanced piston valving incorporates larger port apertures and a tuned multi-stage steel shim stack that provides ultra-plush compliance over small braking bumps while generating massive hydraulic bottoming resistance during high-speed jump over-shoots. The reduced internal friction and refined damping curves allow the front wheel to stay glued to the track surface through rough ruts, eliminating handlebar deflection and delivering unparalleled rider confidence and front-end feedback. ### Technical Specifications & Engineering Specs - **Damping Technology**: Works Showa high-flow compression and rebound valve assemblies - **Piston Design**: CNC-machined large-port aluminum pistons with precision micro-shims - **Rod Coating**: Low-friction Diamond-Like Carbon (DLC) coating on damper cartridge rods - **Fluid Compatibility**: Calibrated for Showa SS-19 / 5W synthetic suspension fluid - **Application**: 49mm Showa twin-chamber spring fork platforms ### Step-by-Step Installation & Safety Protocols > [!CAUTION] > Safety & Installation Notice: Fork suspension rebuilding requires specialized suspension tools, including cartridge holding tools, seal drivers, and precision oil height measurement gauges. Improper assembly can cause fork binding or damping failure. Professional installation by a certified suspension specialist is highly recommended. Installation involves removing the fork legs from the motorcycle triple clamps. Unscrew the fork top caps, drain the old fork fluid, and disassemble the internal damping cartridges using dedicated holding tools. Replace the OEM valving pistons with the Works Showa high-flow assemblies, setting the shim stack configuration according to your rider weight and skill level. Reassemble the cartridges using fresh low-friction seals and dust wipers. Fill the inner cartridge and outer chambers with high-grade 5W suspension fluid (such as Showa SS-19), bleed all air from the cartridge rod until stroke resistance is smooth and continuous, set the outer chamber oil volume, and torque top caps to 30 Nm. Reinstall fork legs into triple clamps, torquing clamp bolts to factory specifications. ### Maintenance & Bleeding Routine Maintenance involves bleeding excess air pressure from fork top-cap bleeders before every ride and changing fork oil every 20-30 race hours. ### Frequently Asked Questions **How does this kit eliminate the harsh feeling in stock RM-Z forks?** The Works Showa high-flow pistons allow oil to flow with less restriction during high-velocity impacts, eliminating hydraulic locking and absorbing square-edge chop without jarring the rider's wrists. **Does this kit include springs for my weight?** The kit includes valving pistons, shims, and cartridge components; optional matched-rate Showa chrome-silicon fork springs can be selected based on rider weight. **How often should I change fork oil with this Works kit?** For optimal damping performance and seal longevity, changing the outer chamber fork fluid every 20 operating hours is recommended for competitive motocross. **Why is bleeding air from the fork caps important before every moto?** As forks stroke, internal heat and atmospheric pressure changes cause air pressure buildup in the outer chambers, making the forks feel progressively harsh on small bumps. Bleeding equalizes pressure to atmospheric baseline.

MSRP: $3,500.00 $2,800.00
TM Designworks Baja Skid Plate - TM Designworks aftermarket dirt bike part
20% OFF
Protection

TM Designworks Baja Skid Plate

The TM Designworks Baja Skid Plate is an ultra-rugged, full-coverage off-road skid plate engineered in the USA to conquer extreme rocky desert terrain, GNCC mud courses, and hard enduro obstacles. When negotiating rock gardens, boulder fields, and fallen logs, heavy aluminum skid plates easily hang up on obstacles, rattle loudly, and transmit severe impact shocks into the frame. TM Designworks resolves this with their championship-winning Return-Memory composite design. Manufactured from a proprietary high-density, low-friction composite plastic with built-in silicone lubrication additives, the Baja Skid Plate provides an ultra-slick underside that allows the motorcycle to glide effortlessly over logs and jagged rocks. The material absorbs punishing vertical and lateral impacts, flexing to dissipate energy before returning instantly to its original shape without cracking or permanently bending. The Baja model features extended side-protection ears that wrap high around the water pump, clutch cover, ignition cover, and lower frame rails. Furthermore, the plastic composite dampens internal engine resonance, resulting in a noticeably quieter ride with zero frame-binding stiffness. ### Technical Specifications & Engineering Specs - **Material**: Proprietary Return-Memory UHMW composite with infused slicking agents - **Coverage**: Full cradle coverage with tall protective side ears for water pump and ignition - **Glide Coefficient**: Ultra-low friction bottom surface glides over rocks without sticking - **Chassis Compliance**: Preserves engineered frame flex characteristics without harshness - **Manufacturing**: 100% designed and manufactured in the USA - **Fasteners**: High-tensile stainless steel Allen bolts with aluminum countersunk washers ### Step-by-Step Installation & Safety Protocols Installation is straightforward and utilizes heavy-duty aluminum mounting brackets. Clean the underside of the frame cradle. Place the TM Designworks Baja Skid Plate against the frame rails, hook the rear bracket over the frame cross-brace, and align the front mounting holes with the chassis brackets. Insert the provided countersunk stainless steel Allen bolts with thread locker and torque to 10-12 Nm. Verify that the plate maintains adequate clearance around water hoses and the exhaust header. ### Maintenance & Care Routine Maintenance is exceptionally easy: wash with water and a brush. The composite plastic will not rust, corrode, or dent. Remove during major engine overhauls to clean accumulated dirt from the frame rails. ### Frequently Asked Questions **Why choose a TM Designworks composite skid plate over aluminum?** Composite plastic glides smoothly over rocks without catching or gouging, absorbs engine noise rather than amplifying it, and flexes with the chassis without creating a harsh, rigid ride. **How does Return-Memory composite withstand rock impacts?** The ultra-high molecular weight composite has immense elastic memory; when struck by a boulder, it temporarily deflects to absorb the kinetic shock and instantly springs back to shape. **Is there an oil drain hole in the bottom of the plate?** Yes, the plate features a precision-molded drain access hole allowing quick engine oil drainage without removing the skid plate. **Does this skid plate rattle against the frame?** No. The pliable composite plastic sits snugly against the frame tubes without metal-on-metal rattling, eliminating irritating engine vibrations. **Can the plate withstand sub-zero winter temperatures?** Yes. The UHMW composite formula is freeze-tested to resist cold-temperature embrittlement down to -40°F without shattering on rock impacts.

MSRP: $139.95 $111.96
TM Designworks Factory Edition Chain Guide - TM Designworks aftermarket dirt bike part
20% OFF
Drive Chains

TM Designworks Factory Edition Chain Guide

The TM Designworks Factory Edition Rear Chain Guide is the virtually indestructible benchmark chain management system engineered to replace weak, bendable OEM aluminum and plastic chain guides. Stock chain guides utilize thin stamped aluminum outer shells that easily bend inward when struck by rocks, ruts, or logs. Once bent, the OEM guide derails the drive chain, often causing the chain to wad up around the countershaft sprocket and crack the engine cases. The TM Designworks guide completely eliminates this catastrophic failure mode. Manufactured in the USA from a proprietary Zero-Drag Return-Memory UHMW (Ultra High Molecular Weight) composite plastic, the Factory Edition guide absorbs violent rock and log impacts and instantly flexes back to its original geometric shape. The composite material is infused with friction-reducing lubrication additives, allowing the chain to glide through the guide with minimal resistance and reduced drive noise. The guide features extended front and rear guide wear pads that keep the chain tracking perfectly straight onto the rear sprocket teeth, even under severe swingarm flex. The bottom wear pad is fully replaceable, allowing low-cost maintenance over years of abusive riding. ### Technical Specifications & Engineering Specs - **Housing Material**: Proprietary Return-Memory UHMW polyethylene composite - **Friction Reduction**: Infused silicone/dry-lubricant composite formulation - **Wear Pad**: Replaceable bottom rub block with recessed stainless hardware - **Impact Absorption**: 100% elastic recovery from direct rock and log strikes - **Country of Origin**: Made in the USA ### Step-by-Step Installation & Safety Protocols Installation is simple and utilizes the factory swingarm mounting tabs. Remove the two mounting bolts holding the stock chain guide. Slide the old guide off the chain. Position the TM Designworks Factory Edition guide around the lower chain run and align it with the swingarm mounting holes. Reinstall the mounting bolts using the supplied heavy-duty stainless steel hardware and thread locker. Torque the mounting bolts to 10-12 Nm (do not over-torque, which can deform the swingarm tabs). Spin the rear wheel to ensure the chain passes freely through the center channel without rubbing against the side plates. ### Maintenance & Wear Inspection Maintenance consists of periodically checking the thickness of the lower wear block. When the wear groove reaches the internal wear indicator mark, replace the wear block using a TM Designworks replacement insert. ### Frequently Asked Questions **How does Return-Memory plastic prevent chain derailment?** Unlike aluminum guides that stay permanently bent after taking an impact from a rock or rut, TM Designworks Return-Memory composite flexes to absorb the blow and immediately springs back to true alignment, keeping the chain centered on the sprocket. **Is the internal wear pad replaceable on this chain guide?** Yes. The lower wear block can be unbolted and replaced when worn, meaning you never have to replace the entire outer guide housing. **Will the TM Designworks chain guide fit oversized rear sprockets?** Yes. The Factory Edition guide is engineered with ample internal clearance to accommodate rear sprockets up to 52 teeth without rubbing. **Does this guide reduce drive noise?** Yes. The composite plastic absorbs chain slapping noises far more effectively than resonant aluminum stock guides.

MSRP: $99.95 $79.96
Twin Air Dual Stage Air Filter - Twin Air aftermarket dirt bike part
20% OFF
Intake & Fuel

Twin Air Dual Stage Air Filter

The Twin Air Dual Stage Air Filter (2-stage air filter / two-stage air filter) is the undisputed gold standard in off-road engine filtration, engineered to replace single-layer or low-quality OEM air filters with maximum airflow and impenetrable dust protection. An engine is an air pump: a single teaspoon of fine dirt passing through a compromised filter will destroy piston rings, scour cylinder walls, and chew through intake valve seats in a matter of minutes. Twin Air pioneered the dual-stage reticulated foam air filter to eliminate this danger completely. The Twin Air filter is constructed from two distinct layers of open-pore reticulated polyurethane foam that are flame-laminated together using a proprietary heat-fusion process (no restrictive chemical adhesives are used between the foam layers). The coarse outer foam layer features 45-pore density designed to capture larger airborne particles of dirt, sand, and roost without restricting air velocity. The fine inner foam layer features 65-pore density that acts as a second filter, trapping microscopic dust and silica particles while allowing clean, unobstructed airflow into the intake tract. A thick, flat foam sealing ring greaseless base forms a flush, airtight seal against the airbox filter cage flange. ### Technical Specifications & Engineering Specs - **Filter Construction**: Dual-stage reticulated open-cell polyurethane foam - **Pore Density**: 45 PPI (Pores Per Inch) coarse outer foam / 65 PPI fine inner foam - **Bonding Method**: Thermal flame-lamination (100% glue-free airflow membrane) - **Sealing Base**: Thick, flat foam base ring for an airtight greaseless airbox seal - **Seam Construction**: High-temperature chemical-welded perimeter seams ### Step-by-Step Installation & Safety Protocols Installation is performed in a clean environment. Saturate the clean foam filter with high-tack foam air filter oil (such as Twin Air Liquid Power). Squeeze—never wring or twist—the filter thoroughly to distribute oil evenly throughout both foam layers until the entire filter exhibits a uniform color. Allow the carrier solvent to evaporate for 15-30 minutes until the filter is tacky. Apply a thin rim of filter sealing grease around the flat base if desired (though Twin Air's thick base seals airtight dry). Mount the filter onto the airbox support cage, ensuring the locating pins engage the cage holes properly. Insert the assembly into the airbox, tighten the central retaining bolt or wire bail, and run your fingers around the perimeter to verify a 100% airtight seal. ### Maintenance & Cleaning Schedule Maintenance requires washing dirty filters in dedicated foam filter cleaner, rinsing with warm water, drying completely, and re-oiling before every ride. Replace the filter annually or if foam begins to degrade. ### Frequently Asked Questions **Why is flame lamination superior to glued foam filters?** Glued foam filters have a solid layer of glue between the foam sheets that blocks air passages and can dissolve when washed in filter solvents. Flame lamination fuses the foam cells thermally, ensuring 100% unrestricted airflow and solvent resistance. **How often should I clean and re-oil my Twin Air filter?** In dusty, sandy, or race conditions, the air filter should be replaced or cleaned after every single ride. In casual trail conditions, inspect after every ride and clean whenever the outer foam surface is discolored by dirt. **Can I wash my Twin Air filter with gasoline?** No! Never use gasoline to clean foam filters. Gasoline destroys the polyurethane foam cell structure, hardens the foam, and dissolves the seam adhesives. Always use specialized foam filter cleaner or mineral spirits followed by warm soapy water. **How do I tell if an air filter is properly oiled?** A properly oiled filter has a uniform, saturated color with no dry white/light spots, and is tacky to the touch without excess liquid dripping from the foam.

MSRP: $32.95 $26.36
Twin Air Powerflow Throttle Body Kit - Twin Air aftermarket dirt bike part
20% OFF
Intake & Fuel

Twin Air Powerflow Throttle Body Kit

The Twin Air Powerflow Throttle Body & Airbox Kit is a premier intake performance upgrade engineered to replace restrictive OEM air filter cages, fragile backfire screens, and narrow intake boots with an unrestricted, maximum-airflow induction system. Modern four-stroke dirt bikes feature a restrictive wire mesh backfire screen built into the stock plastic filter cage to prevent intake flame backfires from igniting the filter. However, this dense wire screen creates severe airflow drag, reducing air velocity and choking throttle response. The Twin Air Powerflow Kit solves this restriction by replacing the stock plastic cage and screen with a rigid, CNC-machined 6061-T6 billet aluminum cage and an oversized backfire-resistant dual-stage air filter. The filter features a specialized inner layer of flame-retardant foam that safely dissipates backfire sparks without requiring a restrictive metal screen. The precision-machined aluminum cage eliminates plastic flex, ensuring a perfectly flat, leak-proof seal against the airbox flange. The kit includes a rigid aluminum mounting bracket and an oversized aluminum mounting pin that locks the filter securely in place, delivering up to a 10-15% increase in intake air volume and crisp throttle snap off idle. ### Technical Specifications & Engineering Specs - **Cage Material**: CNC-machined 6061-T6 billet aluminum with hard-anodized finish - **Filter Foam**: Custom dual-stage foam with laminated flame-retardant inner barrier - **Airflow Gain**: Up to 10-15% increase in intake air velocity and volume - **Mounting Pin**: Oversized threaded billet aluminum filter holding pin - **Sealing Flange**: Rigid aluminum rim eliminates cage deformation and bypass leaks ### Step-by-Step Installation & Safety Protocols Installation requires removing the seat and factory air filter. Unbolt the stock filter cage and remove the OEM wire backfire screen if separate. Clean the airbox intake boot thoroughly of any dust using a lint-free towel. Install the Twin Air billet aluminum sealing flange (if model requires it) and secure the aluminum mounting hardware. Oil the supplied flame-resistant Powerflow dual-stage filter with quality foam filter oil, mount the filter onto the rigid aluminum Powerflow cage, and insert the assembly into the airbox. Thread the aluminum retaining pin and tighten snugly, verifying that the thick foam base forms a continuous airtight seal around the entire airbox perimeter. ### Maintenance & Filter Servicing Maintenance involves servicing the flame-resistant filter with dedicated foam filter cleaner and re-oiling with foam filter oil before every moto. ### Frequently Asked Questions **Is it safe to eliminate the metal backfire screen?** Yes, because the Twin Air Powerflow kit includes a specially formulated dual-stage filter with an integrated flame-retardant inner foam layer that prevents backfire sparks from igniting the filter without needing a restrictive wire mesh. **What performance improvement will I feel with the Powerflow Kit?** Riders experience noticeably sharper throttle response, faster engine revving through the mid-range, and improved top-end airflow that allows the engine to pull harder down long straights. **Can I use standard Twin Air replacement filters with the Powerflow cage?** No. You must use Twin Air Powerflow replacement filters specifically designed with the oversized profile and flame-retardant foam to fit the Powerflow aluminum cage. **Does eliminating the screen require ECU re-mapping?** Most modern EFI motorcycles adapt automatically to the increased airflow, though custom dyno mapping optimizes the full power potential of the kit.

MSRP: $149.95 $119.96
UFO Plast Complete Restyled Plastic Kit - UFO Plast aftermarket dirt bike part
20% OFF
Plastics & Bodywork

UFO Plast Complete Restyled Plastic Kit

The UFO Plast Complete Restyled Plastic Kit is a complete modern aesthetic transformation package engineered to update the older styling of legendary two-stroke motocross machines with sharp, aggressive, modern factory lines. Older two-stroke bikes (such as classic Yamaha YZ125 and YZ250 models) possess incredible engines and suspension, but their bulbous 2000s-era bodywork looks dated and features wide radiator shrouds that hinder modern forward-riding ergonomics. UFO Plast's Restyled kit completely modernizes the machine with sleek, contemporary bodywork that bolts directly onto the original chassis. Manufactured in Italy from premium high-density polyethylene and polypropylene polymers, the UFO Restyled kit features injection-molded panels that match modern OEM gloss, color vibrancy, and impact flexibility. The restyled radiator shrouds are significantly slimmer and flatter at the tank junction, allowing the rider to slide smoothly forward over the fuel cap when attacking corners. The rear fender and integrated side number plates emulate modern four-stroke factory styling with clean, angular lines and optimal surface area for race number graphics. All panels feature pre-drilled precision mounting holes that line up with original factory frame and airbox mounting points without needing subframe modifications. ### Technical Specifications & Engineering Specs - **Material Formulation**: High-density UV-resistant polypropylene polymer - **Design Architecture**: Modernized slim ergonomics with angular factory styling - **Included Bodywork**: Restyled front fender, rear fender, radiator shrouds, side number plates, front number plate, and fork guards - **Fitment Engineering**: Direct 100% bolt-on compatibility with original OEM subframe and airbox - **Manufacturing Origin**: Made in Pontedera, Italy ### Step-by-Step Installation & Safety Protocols Installation requires approximately 45 to 60 minutes. Remove the seat, fuel tank shrouds, front/rear fenders, and side number plates. Clean the airbox and frame thoroughly. Mount the new restyled front fender and front number plate. Bolt on the new restyled radiator shrouds, aligning the tank and radiator mounting tabs. Install the restyled rear fender and side number panels, securing with the factory hardware and supplied collar bushings. Reinstall the seat, verifying that the seat base clips neatly into the restyled front tank-panel junction, and torque all hardware to 6-8 Nm. ### Maintenance & Plastic Care Maintenance involves washing with standard soap and water and avoiding harsh solvents. Use a silicone detailer spray to preserve gloss and repel mud. ### Frequently Asked Questions **Do I need to modify my subframe or airbox to install the UFO Restyled Kit?** No. UFO Plast engineered this restyle kit to bolt directly onto the stock factory subframe, airbox, fuel tank, and frame mounts using standard mounting points. **Can I use standard OEM graphics on the restyled plastic kit?** No. Because the panel contours and radiator shrouds have a modern, restyled profile, you must use graphics templates specifically designed for the 'UFO Restyled' plastic pattern. **How does the slimmer shroud design improve riding technique?** The slimmer shroud geometry allows your legs to move closer to the motorcycle's centerline and slide further forward over the front wheel in corners, dramatically improving front-end traction and steering agility. **Is a modern front number plate included in the restyle kit?** Yes, the kit includes an updated modern front number plate that mounts to the stock top and bottom triple clamps.

MSRP: $149.95 $119.96
UFO Plast Vented Front Fender - UFO Plast aftermarket dirt bike part
20% OFF
Plastics & Bodywork

UFO Plast Vented Front Fender

The UFO Plast Vented Front Fender is an advanced, aerodynamic replacement front fender engineered to provide enhanced radiator airflow and roost deflection for modern motocross and off-road motorcycles. Factory front fenders often have solid rear sections that block cooling air from reaching the radiators at speed, leading to high engine operating temperatures during hot summer motos, deep mud events, and slow technical singletrack climbs. UFO Plast solves this by incorporating functional cooling vents into the rear fender section. Manufactured in Pontedera, Italy, from premium injection-molded polypropylene, the UFO Vented Front Fender offers exceptional resistance to rock impact fractures, stress whitening, and UV sunlight fading. The rear half of the fender features engineered aerodynamic louvered vents that scoop oncoming air and direct high-velocity airflow straight into the radiator cooling fins while simultaneously blocking mud, roost, and debris from packing into the core. The top surface incorporates structural stiffening ribs that prevent fender flap and deflection at high speeds. ### Technical Specifications & Engineering Specs - **Material**: High-impact, UV-stabilized polypropylene resin - **Aerodynamics**: Integrated rear cooling louvers for direct radiator airflow - **Structural Design**: Longitudinal stiffening ribs to eliminate high-speed aerodynamic flap - **Mounting Configuration**: Universal 4-bolt pattern compatible with Japanese and European lower clamps - **Origin**: Precision injection molded in Pontedera, Italy - **Hardware Integration**: Uses OEM collar washers and 6mm hex flange bolts ### Step-by-Step Installation & Safety Protocols Installation is quick and easy. Remove the four 8mm or 10mm bolts beneath the lower triple clamp holding the existing front fender. Remove the old fender and inspect the triple clamp mounting face and speedometer cable guide (if equipped). The UFO fender features a pre-drilled or precision-marked 4-bolt universal mounting grid. Align the fender under the lower triple clamp, insert the four bolts with their wide steel collar washers, and tighten evenly in an X-pattern to 8-10 Nm. Ensure the fender clears the front tire at full fork compression and does not bind on brake lines during lock-to-lock steering. ### Maintenance & Cleaning Routine Maintenance requires washing with regular soap and water and clearing any dried mud out of the rear cooling louvers after muddy events. Avoid harsh pressure washing directly on vinyl graphics or thin edges. ### Frequently Asked Questions **How do the rear vents improve engine cooling?** The vents allow cooling airflow to pass directly through the fender and into the radiator fins, lowering coolant temperatures by several degrees during high-demand riding. **Will the vented design allow mud to spray onto my goggles?** No. The aerodynamic louvers are angled downward and rearward, directing air toward the engine while blocking roost and mud from flying upward toward the rider. **Will this fender fit different brands and years of motocross bikes?** Yes. UFO Plast manufactures this fender with a universal lower clamp mounting pattern that fits standard Japanese and European four-bolt triple clamp configurations. **Can I drill additional mounting holes if my clamp pattern is unique?** Yes, the reinforced top mounting base can be custom-drilled if required for vintage or unique triple clamp bolt spacings. **Does this fender prevent front tire mud packing?** The wide underside radius provides generous clearance above standard 21-inch front tires, preventing sticky clay from jamming between the tire tread and the fender.

MSRP: $34.95 $27.96
Vertex Big Bore Piston Kit 270cc - Vertex aftermarket dirt bike part
20% OFF
Engine Rebuild Kits

Vertex Big Bore Piston Kit 270cc

The Vertex Big Bore 270cc Piston Kit is a high-performance engine upgrade engineered to transform 250cc four-stroke motocross and off-road motorcycles with a substantial increase in usable torque and low-to-midrange horsepower. Standard 250F machines require high revs to generate momentum, often demanding excessive clutch slipping in tight corners and steep hill climbs. The Vertex 270cc big bore piston expands cylinder displacement, delivering immediate low-end roll-on power and heavy mid-range torque that pulls higher gears effortlessly out of corners. Manufactured in Italy utilizing advanced aerospace gravity-cast or forged aluminum alloy with high silicon content (typically 12-18%), Vertex pistons deliver ultra-low thermal expansion rates, tighter cylinder-to-wall clearances, and exceptional piston stability under high combustion temperatures. The piston skirt is treated with a specialized molybdenum disulphide (MOS2) dry-film coating that reduces friction during the critical engine break-in phase and prevents skirt scuffing under severe operating conditions. The kit includes the 270cc big bore piston, nitrided steel piston rings, a high-strength DLC or case-hardened wrist pin, and wire circlips. ### Technical Specifications & Engineering Specs - **Displacement Expansion**: Expands 250cc engine platform to 270cc - **Material**: High-silicon aerospace aluminum alloy (low thermal expansion) - **Skirt Treatment**: Factory-applied Molybdenum Disulphide (MOS2) anti-friction coating - **Ring Set**: Nitrided high-tensile steel compression and oil control rings - **Country of Origin**: Precision manufactured in Italy ### Step-by-Step Installation & Safety Protocols Installation requires a matching oversized cylinder or a precision-bored and re-plated (Nikasil) factory cylinder. Disassemble the top-end, removing the cam cover, cam chain tensioner, camshafts, cylinder head, and stock cylinder. Measure ring end gaps inside the clean bore using a feeler gauge (adjusting gap with a diamond file if necessary to manufacturer specs, typically 0.004 inches per inch of bore). Install the rings onto the piston with marks facing upward, stagger the ring gaps at 120-degree intervals, attach one circlip into the piston, slide the wrist pin through the connecting rod small-end, and install the second circlip, ensuring the circlip gap faces away from the piston notch. Lubricate the cylinder bore and piston with assembly lube, compress the rings, slide the cylinder down, and reassemble the cylinder head using new head and base gaskets. Torque all cylinder head bolts in proper sequence to factory specs. ### Break-In & Maintenance Protocol Follow a strict break-in procedure: three progressive 15-minute heat cycles with cooling intervals, followed by varied-RPM riding before full race throttle. Change engine oil and oil filter after the first 2 operating hours to remove break-in wear particles. ### Frequently Asked Questions **Will this 270cc big bore kit fit my stock cylinder?** No. This 270cc piston requires an aftermarket big-bore cylinder or a stock cylinder that has been professionally bored out and re-plated with Nikasil coating to match the specific big-bore diameter. **Does a big bore kit make the engine run hotter?** A big-bore engine generates additional combustion energy and heat. Pairing the 270cc kit with high-performance engine coolant (or an upgraded water pump impeller) and ensuring correct air-fuel mapping prevents overheating. **Do I need race gas to run this 270cc piston?** The Vertex 270cc piston is engineered to maintain a safe, high-performance compression ratio compatible with premium 91-93 octane pump fuel, though race fuel can be utilized for extreme competition applications. **What is the ring gap specification for big bore pistons?** Always refer to the enclosed Vertex specification card, but standard rule of thumb is 0.004 inches of top ring end-gap per inch of cylinder bore diameter to prevent ring end butting under high heat.

MSRP: $249.95 $199.96
Vertex High Compression Piston - Vertex aftermarket dirt bike part
20% OFF
Engine Rebuild Kits

Vertex High Compression Piston

The Vertex High Compression Piston is a precision-engineered four-stroke engine component designed to replace the standard factory piston, significantly enhancing throttle snap, midrange torque, and horsepower across the rev range. By increasing static compression by 0.5 to 1.0 full point above OEM specifications through an optimized dome profile, this piston increases cylinder pressure and thermal efficiency, resulting in harder acceleration off the bottom, quicker engine spool-up, and explosive power out of corners. Forged from high-tensile 2618 aerospace aluminum alloy, the Vertex High Compression piston is built to withstand extreme combustion pressures and high cylinder temperatures without structural deformation. The piston features a specialized boxed-bridge under-crown forging that provides exceptional rigidity with minimal reciprocating mass, reducing vibrational stress on the crankshaft and main bearings. The skirts are coated with molybdenum disulphide (MOS2) to minimize friction and prevent scuffing against the cylinder bore. Precision-machined valve pockets provide ample clearance for high-lift aftermarket camshafts and oversized valves. ### Technical Specifications & Engineering Specs - **Material**: 2618 aerospace-grade forged aluminum alloy - **Compression Increase**: +0.5 to +1.0 point above stock OEM compression ratio - **Under-Crown Design**: Rigid boxed-bridge structure with weight-optimized webbing - **Valve Reliefs**: CNC-machined deep pockets for high-lift camshaft clearance - **Pin & Rings**: Hardened tool steel wrist pin and nitrided low-friction ring pack ### Step-by-Step Installation & Safety Protocols Installation requires professional engine assembly practices. Disassemble the cylinder head and measure existing valve clearance and timing. Check the cylinder bore for taper and out-of-round using a bore gauge. Check ring end gaps inside the cylinder (typical top ring gap 0.004 inches per inch of bore diameter). Install the rings, ensuring the identification marks face up. Fit the piston onto the connecting rod using the DLC-coated wrist pin and secure with the provided wire circlips (double-check that circlips are fully locked into the groove). Install the high-compression cylinder head gasket, torque the cylinder head bolts to factory specification, and degree/time the camshafts. Check piston-to-valve clearance using modeling clay if non-stock camshafts are installed. ### Engine Tuning & Fueling Requirements Break in the engine with two short, progressive 15-minute heat cycles under light load, followed by an oil and filter change. Ensure fuel mapping supplies adequate octane and fuel volume under full load. ### Frequently Asked Questions **Do I have to run race fuel with a Vertex High Compression piston?** Most Vertex High Compression pistons (e.g., 13.5:1 to 14.0:1) run safely on fresh, high-octane 91-93 pump gas. If you advance ignition timing or ride in extreme ambient heat, blending 50/50 with high-octane race fuel provides an extra detonation safety margin. **Will higher compression cause harder electric starting or kickstarting?** Modern four-stroke dirt bikes with automatic decompression mechanisms start effortlessly with high-compression pistons. Ensure your battery is in good health and valve clearances are properly set. **How does higher compression affect engine operating temperatures?** Higher compression increases combustion efficiency, which can slightly elevate engine temperatures under heavy race loads. Using quality synthetic engine oil and a high-flow radiator cap or water pump kit ensures optimal cooling. **Can I run stock valve springs with this piston?** Yes, if using stock camshafts. If upgrading to aggressive high-lift aftermarket camshafts alongside the high-compression piston, heavy-duty valve springs are recommended.

MSRP: $215.00 $172.00
Vertex Top-End Rebuild Kit - Vertex aftermarket dirt bike part
20% OFF
Engine Rebuild Kits

Vertex Top-End Rebuild Kit

The Vertex Complete Top-End Rebuild Kit is the gold-standard factory replacement package designed to restore lost compression, throttle response, and engine reliability to modern four-stroke and two-stroke motocross machines. Over 30 to 50 race hours, stock pistons suffer skirt wear, ring tension loss, and carbon buildup, leading to blow-by, oil consumption, and the catastrophic risk of piston skirt collapse that destroys cylinder walls and crankshaft assemblies. The Vertex Top-End kit provides all original equipment quality components required to complete a professional top-end overhaul in a single box. Vertex is the premier OEM piston supplier to Austrian factory racing teams (KTM, Husqvarna, GASGAS), and their aftermarket kits match or exceed original factory tolerances. The piston is cast or forged from high-silicon aluminum alloy, offering tight operating clearances and superior thermal stability. The piston skirt features a factory-applied MOS2 anti-friction coating that prevents cold-start galling. The kit includes a premium piston, OEM-spec nitrided piston rings, lightweight wrist pin, circlips, top-end needle bearing (for two-strokes), and a complete top-end gasket kit manufactured from premium MLS (multi-layer steel) and fluoropolymer-coated materials. ### Technical Specifications & Engineering Specs - **Piston Composition**: High-silicon forged or gravity-cast aluminum alloy - **Piston Sizing**: Available in precision A, B, and C size gradations (+0.01mm) - **Gasket Composition**: Multi-Layer Steel (MLS) head gasket and fluoropolymer base gasket - **Coating**: Molybdenum Disulphide (MOS2) skirt treatment - **OEM Cross-Reference**: Factory OEM supplier to European motorcycle manufacturers ### Step-by-Step Installation & Safety Protocols Installation requires a clean workbench, metric sockets, a torque wrench, feeler gauges, and assembly lubricant. Drain coolant and remove the fuel tank, exhaust, and throttle body/carburetor. Remove the valve cover, check valve clearances, lock engine at TDC, relieve cam chain tension, and remove the cylinder head and cylinder. Discard old gaskets. Clean the cylinder deck and inspect the cylinder bore cross-hatching. Measure ring end-gap inside the bore. Assemble rings on the piston, install the wrist pin and circlips, ensuring circlips are 100% seated in their grooves. Lubricate with four-stroke engine oil or two-stroke premix, compress rings, slide the cylinder down, and torque the cylinder head bolts in diagonal stages to exact manufacturer specifications. ### Maintenance & Service Schedule Maintenance requires performing initial break-in heat cycles and changing the engine oil and filter after the first 2 hours of runtime to capture break-in particles. Inspect valve clearances every 15-20 hours. ### Frequently Asked Questions **How do I know what piston size (A, B, or C) to choose?** Vertex offers graded piston sizes (A, B, C) that differ by 0.01mm increments. Size A is for new or freshly plated cylinders; Size B and C are for cylinders with minor operational wear, restoring factory-tight piston-to-cylinder clearance. **Are all necessary gaskets included in the Vertex Top-End Kit?** Yes. The kit includes the multi-layer steel head gasket, base gasket, cam chain tensioner gasket, exhaust port crush gasket, and all essential top-end O-rings. **How many hours can I run a Vertex piston before the next rebuild?** For competitive motocross racing on 250Fs, top-end replacement is recommended every 30-40 hours; for 450Fs and trail/enduro use, intervals typically range from 50 to 75 hours depending on maintenance and air filter care. **Is wrist pin lubrication necessary during assembly?** Yes. Always coat the wrist pin and connecting rod small-end bearing with high-quality assembly lube or clean engine oil prior to sliding the pin into place.

MSRP: $189.95 $151.96
Wiseco Complete Bottom End Kit - Wiseco aftermarket dirt bike part
20% OFF
Engine Rebuild Kits

Wiseco Complete Bottom End Kit

The Wiseco Complete Bottom End Rebuild Kit is the definitive, heavy-duty solution engineered to completely overhaul worn or failed lower engine assemblies on two-stroke and four-stroke dirt bikes. When crankshaft main bearings develop radial play or the connecting rod big-end bearing begins to fail, the entire rotating assembly must be replaced before catastrophic rod breakage destroys the crankcases and cylinder. Wiseco's complete bottom-end kit provides all premium matched components required for a complete lower-end rebuild in one package. At the heart of the kit is a precision-forged crankshaft assembly manufactured from heat-treated alloy steel. The connecting rod is shot-peened to eliminate surface stress risers and features precision double-honed bearing journals for maximum oil flow and bearing lifespan. The kit includes Wiseco's double-sealed or open premium Koyo/NTN main bearings, a heavy-duty crankshaft counter-balance pin, hardened thrust washers, and a comprehensive bottom-end gasket and oil seal kit containing all case half gaskets, crankcase seals, water pump seals, and countershaft seals. ### Technical Specifications & Engineering Specs - **Crankshaft Material**: Heat-treated, double-forged alloy steel - **Connecting Rod**: Shot-peened, double-honed rod with high-flow oiling slots - **Main Bearings**: Precision Japanese Koyo / NTN high-RPM crankshaft bearings - **Gasket & Seal Kit**: Complete crankcase, transmission, and water pump oil seals - **Factory Trueing**: Assembled and trued to within OEM runout tolerances (<0.02mm) ### Step-by-Step Installation & Safety Protocols Installation requires a complete engine removal, case splitter tool, flywheel puller, and crank assembly installation tools. Remove the engine from the chassis, strip the top-end, clutch, and stator assemblies. Use a crankcase splitter tool to separate the engine cases evenly without damaging the machined gasket mating surfaces. Extract the old crankshaft and drive out worn main bearings using a blind bearing puller or heat-assisted case expansion. Press the new main bearings square into the cases. Install the Wiseco crankshaft using a crank pulling tool to draw the crank smoothly into the bearing inner race (never hammer on a crankshaft, which knocks it out of true). Reassemble cases with new gaskets, install oil seals with lips greased, and torque case bolts in sequence to OEM specs. ### Service & Maintenance Protocol Maintenance involves checking engine oil for metallic particles after initial break-in and maintaining strict oil change intervals. Ensure correct transmission fluid levels before starting. ### Frequently Asked Questions **Is the Wiseco crankshaft pre-assembled and trued out of the box?** Yes. Every Wiseco crankshaft comes fully assembled with the connecting rod, big-end bearing, and thrust washers, factory-trued to within OEM runout tolerances (typically less than 0.02mm). **Can I install the crankshaft by tapping it with a mallet?** No. Never strike a crankshaft with a hammer or mallet. Doing so misaligns the crankshaft webs, causing severe engine vibration and rapid bearing failure. Always use a dedicated crank puller/installer tool. **Does the kit include water pump and transmission seals?** Yes. The Wiseco bottom-end kit contains a complete bottom-end gasket and seal set, including main crank seals, countershaft seal, shifter seal, clutch actuator seal, and water pump seals. **What causes connecting rod big-end bearing failure in dirt bikes?** Primary causes include oil starvation, running past recommended service hours, contaminated engine oil, water ingestion through the airbox, or severe over-revving.

MSRP: $399.95 $319.96
Wiseco Performance Clutch Basket - Wiseco aftermarket dirt bike part
20% OFF
Engine Rebuild Kits

Wiseco Performance Clutch Basket

The Wiseco Performance Forged Clutch Basket is a heavy-duty, race-proven driveline upgrade engineered to replace weak cast aluminum OEM clutch baskets that notch, groove, and fail under aggressive motocross and supercross riding. Stock cast baskets quickly develop saw-tooth notches along the clutch tang fingers from repeated clutch dumps and hard acceleration. These notches prevent clutch plates from sliding freely, causing severe clutch drag, erratic lever feel, slipping under load, and difficult neutral selection. Wiseco eliminates this common failure by precision-forging the clutch basket from aerospace-grade aluminum alloy, aligning the grain structure to achieve incredible impact toughness and fatigue resistance. The basket is fully CNC finish-machined and treated with an advanced hard-anodized and Teflon-impregnated coating. This coating creates a rock-hard, ultra-slick surface that resists plate grooving for hundreds of race hours while allowing the clutch friction and steel plates to glide effortlessly. Large oiling holes and channels are machined into the basket walls, channeling engine oil directly into the clutch pack to dissipate heat, reduce clutch fade, and prolong plate lifespan. ### Technical Specifications & Engineering Specs - **Manufacturing Process**: Precision forged aerospace-grade aluminum alloy - **Surface Treatment**: Hard-anodized and Teflon-impregnated coating - **Oil Flow Optimization**: CNC-machined oil flow channels across basket walls - **Included Fasteners**: Grade 8 hex bolts with pre-applied thread locking compound - **Hardware Integration**: Includes replacement elastomer backing cushions ### Step-by-Step Installation & Safety Protocols Installation requires a clutch holding tool, drill press or hand drill, and a torque wrench. Drain engine/transmission oil and remove the clutch cover. Remove the clutch springs, pressure plate, and clutch pack. Use a clutch holding tool to hold the inner hub and remove the main clutch center nut. Extract the OEM basket and gear assembly. Drill out the factory rivets holding the stock primary ring gear to the back of the OEM cast basket. Separate the gear and rubber cushions. Transfer the ring gear and new rubber backing cushions to the Wiseco forged basket, securing with the included high-strength Allen bolts and thread locker. Reinstall the basket, inner hub, clutch plates, pressure plate, and torque all fasteners to factory specs. ### Maintenance & Inspection Protocol Maintenance involves inspecting the basket fingers during annual clutch plate replacements and keeping engine oil clean. Check clutch cable/hydraulic free play regularly. ### Frequently Asked Questions **Why do OEM cast clutch baskets notch so quickly?** Factory baskets are made from brittle cast aluminum. Under aggressive acceleration, the steel tangs of the clutch plates repeatedly hammer into the soft cast fingers, quickly creating deep grooves that trap the plates. **Do I reuse my stock primary ring gear with the Wiseco basket?** Yes. The Wiseco kit includes replacement fasteners and rubber cushion hardware, allowing you to transfer your factory primary drive gear from your old cast basket to the new Wiseco forged basket. **How does the Teflon-impregnated hard coat improve clutch performance?** The Teflon coating provides a self-lubricating, ultra-low friction barrier that allows clutch plates to engage and disengage instantly, resulting in smoother lever modulation and eliminating clutch chatter. **What torque is required for the backing plate screws?** Torque the supplied backing plate Allen screws to 12-14 Nm using high-strength red thread locker on clean, degreased threads.

MSRP: $289.00 $231.20
Wiseco Racer Elite Piston Kit - Wiseco aftermarket dirt bike part
20% OFF
Engine Rebuild Kits

Wiseco Racer Elite Piston Kit

The Wiseco Racer Elite Piston Kit represents the pinnacle of modern American four-stroke forged piston engineering, designed for elite motocross racers and engine builders who demand maximum power output, reduced friction, and exceptional fatigue resistance. Engineered in Wiseco's advanced R&D facility in Mentor, Ohio, the Racer Elite piston is fully CNC-machined from a dedicated 2618 aerospace-grade aluminum forging, utilizing a boxed-bridge architecture that offers the highest stiffness-to-weight ratio in the off-road racing industry. The defining technological breakthrough of the Racer Elite is its proprietary ArmorGlide skirt coating combined with an ultra-thin, low-friction ring package. The asymmetrical skirt design optimizes the thrust and non-thrust contact surfaces, minimizing parasitic frictional drag against the cylinder wall while stabilizing the piston at extreme engine speeds exceeding 14,000 RPM. The piston crown features precision-machined smooth valve pockets that promote uniform flame propagation and prevent hot spots that lead to pre-ignition. The kit is equipped with a DLC (Diamond-Like Carbon) coated wrist pin that virtually eliminates small-end pin galling under extreme heat. ### Technical Specifications & Engineering Specs - **Alloy Composition**: Dedicated 2618 aerospace-grade forged aluminum - **Architecture**: Fully CNC-machined boxed-bridge under-crown structure - **Skirt Technology**: ArmorGlide low-friction dry-film lubricant coating - **Wrist Pin**: Diamond-Like Carbon (DLC) coated high-strength tool steel - **Ring Design**: Gas-nitrided ultra-thin low-tension compression and oil rings ### Step-by-Step Installation & Safety Protocols Installation requires precise engine measurement tools. Clean and inspect the Nikasil cylinder bore. Measure piston-to-cylinder clearance using a micrometer and dial bore gauge according to Wiseco's spec sheet. Check the ring end gaps in the bore using feeler gauges. Assemble the rings onto the piston, install the DLC wrist pin, and secure with the provided high-tensile wire circlips (verify 100% engagement in the retention groove). Lubricate the bore and piston with high-grade synthetic four-stroke engine oil, compress the rings, slide the cylinder into place, and torque the cylinder head bolts to factory specifications. ### Break-In & Tuning Guidelines Perform two 15-minute varied-throttle heat cycles, followed by an immediate engine oil and filter change to flush break-in residues before entering race competition. ### Frequently Asked Questions **What makes the DLC-coated wrist pin superior to standard wrist pins?** Diamond-Like Carbon (DLC) coating creates a micro-smooth, diamond-hard surface that drastically lowers friction and prevents wrist pin galling or seizure, even during momentary oil starvation or extreme high-RPM loads. **Why is 2618 alloy used instead of 4032 alloy in Racer Elite pistons?** 2618 aerospace aluminum possesses higher tensile strength and ductile resilience under severe high-heat and high-boost/high-compression conditions, making it the premier material for competition race engines. **Do I need a special ring compressor to install Racer Elite rings?** While careful manual thumb compression is possible, using a tapered ring compressor sleeve matching your cylinder bore diameter ensures seamless, damage-free ring entry into the cylinder bore. **How often should the Racer Elite ring pack be replaced in a pro-level race bike?** In professional competition, refreshing piston rings every 15-20 hours maintains maximum cylinder compression and prevents combustion blow-by.

MSRP: $259.95 $207.96
Yamaha GYTR High-Flow Cylinder Head - Yamaha aftermarket dirt bike part
20% OFF
Engine Rebuild Kits

Yamaha GYTR High-Flow Cylinder Head

The Yamaha GYTR High-Flow CNC Ported Cylinder Head is the ultimate genuine factory performance cylinder head assembly, developed directly by Genuine Yamaha Technology Racing (GYTR) to deliver championship-winning horsepower and torque for competitive Yamaha YZ250F and YZ450F race machines. While stock cylinder heads feature mass-production cast intake and exhaust ports with casting flash and rough surface transitions, the GYTR cylinder head is precision CNC ported on a dedicated 5-axis milling machine using port geometries developed by Yamaha's factory Supercross and MXGP racing teams. The GYTR High-Flow Cylinder Head is CNC machined from a factory-virgin casting to maintain perfect structural metallurgy. The intake and exhaust ports are shaped with optimized cross-sectional areas and refined flow radii that dramatically increase flow velocity and volumetric efficiency across high RPMs without sacrificing low-end tractability. The head comes fully assembled with GYTR performance camshafts, high-lift titanium valves, reinforced beryllium-copper valve seats, and high-rate valve springs that resist valve float at engine speeds exceeding 14,000 RPM. On the track, the GYTR head produces substantial, dyno-proven gains across the entire powerband, transforming the motorcycle into a holeshot-winning race weapon. ### Technical Specifications & Engineering Specs - **Porting**: 5-axis CNC-machined high-velocity intake and exhaust ports - **Valves**: Lightweight titanium competition intake and exhaust valves - **Valve Seats**: Beryllium-copper alloy valve seats for superior heat dissipation - **Camshafts**: High-lift, extended duration GYTR performance camshafts pre-installed - **Springs**: High-rate dual valve springs with titanium retainers ### Step-by-Step Installation & Safety Protocols > [!CAUTION] > Safety & Installation Notice: Cylinder head replacement is an advanced mechanical procedure requiring precision engine timing and torque calibration. Incorrect camshaft timing can cause catastrophic valve-to-piston contact. If you do not possess the necessary precision tools, have this assembly installed by a certified Yamaha technician. Installation begins with engine disassembly: drain coolant and oil, remove exhaust, throttle body, valve cover, and camshafts. Lock the engine at Top Dead Center (TDC). Remove cylinder head bolts and lift the old head away. Discard the old head gasket and install a new OEM multi-layer steel (MLS) head gasket. Position the pre-assembled GYTR cylinder head onto the cylinder dowels. Lubricate the cylinder head bolt threads and washers with engine oil, torquing in diagonal stages to exact Yamaha factory specifications. Install camshafts, set timing marks with precision alignment, tension the cam chain, and check valve clearances using feeler gauges. Reassemble the engine, refill with fresh synthetic oil and coolant, and calibrate the ECU map using the Yamaha Power Tuner App. ### Maintenance & Valve Lash Intervals Maintenance requires checking valve clearances after the first 5 hours of runtime and maintaining strict oil change intervals. ### Frequently Asked Questions **Is the GYTR cylinder head pre-assembled out of the box?** Yes. The GYTR High-Flow cylinder head comes fully assembled with performance camshafts, valves, valve springs, retainers, and cotters, fully shimmed and ready for bolt-on installation. **Can I tune the fuel mapping for this head using the Yamaha Power Tuner app?** Yes. Yamaha provides recommended GYTR competition fuel and ignition maps that can be uploaded directly into your bike's ECU via the free Yamaha Power Tuner smartphone app. **Will this cylinder head reduce engine reliability?** No. Because GYTR is Yamaha's in-house racing division, every component is engineered to meet rigid factory durability standards, delivering pro-level power with factory reliability. **What head gasket should be used with the GYTR cylinder head?** Always use a genuine Yamaha OEM multi-layer steel (MLS) head gasket to ensure proper cylinder sealing and compression height.

MSRP: $1,299.99 $1,039.99

Why Riders Choose Dirt Track Masters for Aftermarket Dirt Bike Parts

Dirt Track Masters is the premier online destination for premium aftermarket dirt bike parts engineered for competitive motocross, enduro, and trail riding. Unlike generic parts distributors, every component in our catalog has been cross-referenced against original equipment manufacturer (OEM) specifications using our proprietary Year-Make-Model (YMM) fitment database, guaranteeing bolt-on compatibility on the first try.

We source directly from industry-leading manufacturers including FMF Racing, ProTaper, Renthal, Vertex Pistons, Acerbis, Pro Circuit, and Wiseco. Our inventory spans high-compression pistons, complete engine rebuild kits, exhaust systems, handlebars, sprocket and chain kits, radiator hose assemblies, clutch components, suspension upgrades, and full plastic body kits.

Whether you are rebuilding a Honda CRF250R top-end, upgrading your KTM 450 SX-F exhaust, or fitting new bars on a Yamaha YZ125, Dirt Track Masters eliminates the guesswork with exact fitment data for every product we sell. All orders over $99 ship free within the continental United States, and most orders placed before 2PM PST ship same-day.

Frequently Asked Questions

What dirt bike brands does Dirt Track Masters carry parts for?
Dirt Track Masters stocks premium aftermarket parts for all major motocross and off-road brands including Honda CRF, Yamaha YZ, KTM SX/EXC, Kawasaki KX, Suzuki RM-Z, and Husqvarna FC/FE. Every part is cross-referenced against OEM specifications to guarantee exact bolt-on fitment.
How does Dirt Track Masters guarantee exact fitment?
Dirt Track Masters uses a proprietary Year-Make-Model (YMM) fitment database that cross-references every aftermarket part against original equipment manufacturer tolerances. Each product listing specifies exact compatible models down to the production year, eliminating guesswork.
Does Dirt Track Masters offer free shipping?
Yes. Dirt Track Masters offers free ground shipping on all orders over $99 within the continental United States. Most orders placed before 2PM PST ship same-day from our warehouse, with typical delivery in 3-5 business days.
What types of dirt bike parts does Dirt Track Masters sell?
Dirt Track Masters specializes in premium aftermarket dirt bike components including high-compression pistons, complete engine rebuild kits, FMF and Pro Circuit exhaust systems, ProTaper and Renthal handlebars, titanium sprocket kits, heavy-duty chains, radiator hose kits, clutch assemblies, suspension components, and Acerbis plastic body kits.